counter

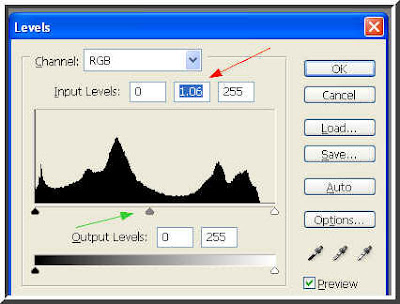
Step 2 : Press CTRL+L. This brings up the Levels dialogue box. I have changed the value in the middle box (red arrow) by dragging the slider (green arrow). There is nothing hard and fast about the values. It will depend on your photo. Never be afraid to experiment.
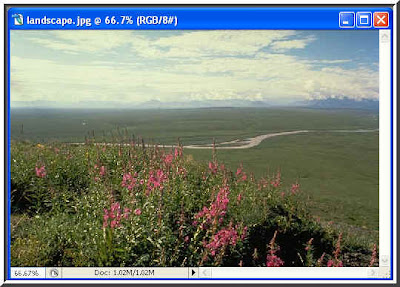 Step 3 : Notice the immediate change. The dark shades have been dispelled to a certain extent.
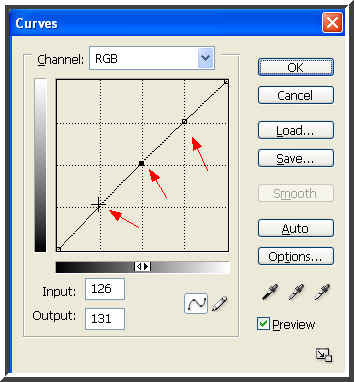
Step 4 : Pres CTRL+M. This brings up the Curves dialogue box. Place three dots on the diagonal line as shown above.
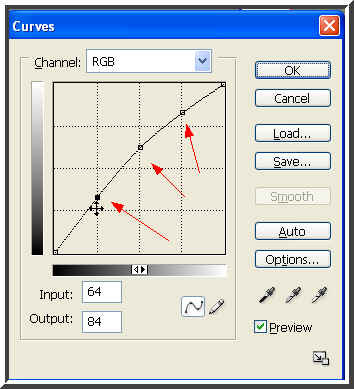
Step 5 : After placing the dots with the cursor. Place your cursor on the middle dot. Use the Up arrow key to move the diagonal up bit by bit till you are satisfied with the result. Do the same with the other two dots.
Step 6 : Look how much the photo has changed with the tweak given to it with Curves.
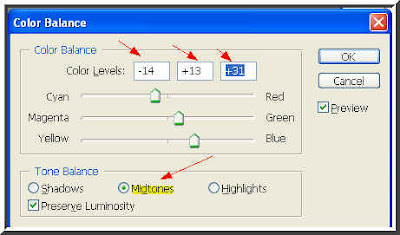
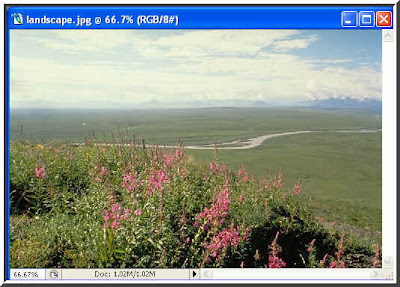
Step 7 : Now press CTRL+B. This will bring up the Color Balance dialogue box. Choose Midtones. It will be so by default. Now drag the Cyan, Magenta and Yeloow sliders. Let us see what happens.
Step 8 : Notice the change. A bit too greenish may be.
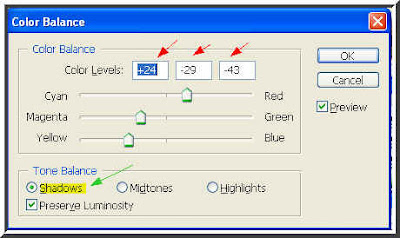
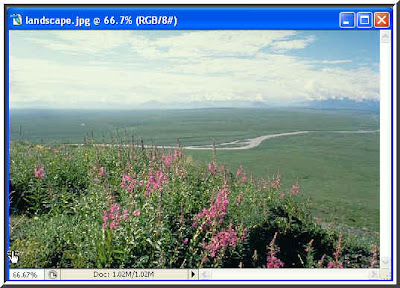
Step 9 : Again press CTRL+B. This will again bring up the Color Balance dialogue box. Now choose Shadows and tweak the Cyan, Magenta and Yellow sliders. You can see the values I have chosen (red arrow).
Step 10 : Notice the change. The greenish tinge has disappeared.
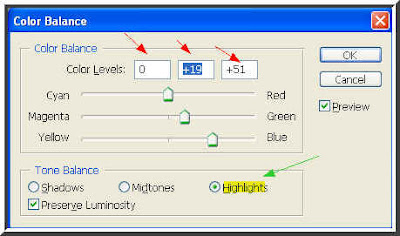
Step 11 : Bring up the Color Balance dialogue box by pressing CTRL+B again. This time choose Highlights. Tweak the Cyan, Magenta and Yellow sliders.
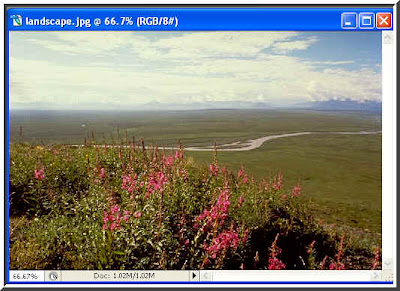
Step 12 : Now the color looks nicely balanced. The sky looks the correct shade of blue too.
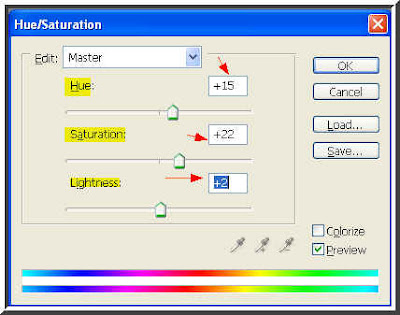
Step 13 : Press CTRL+U. This will bring up the Hue/Saturation dialogue box. I have tweaked the Hue, Saturation and Lightness sliders a bit. You can see the values I have chosen. It may be different in case of your photo.

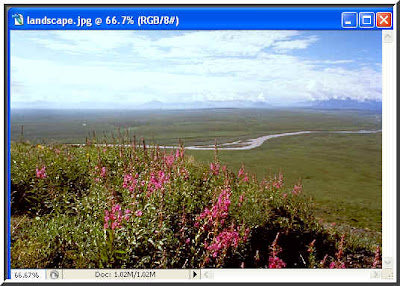
Step 14 : Aha! Now look. It does not look at all like the photo I started out with.
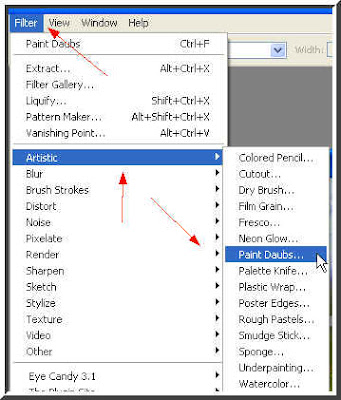
Step 15 : Now let us try something else. Go to Filter>Artistic>Paint Daubs.
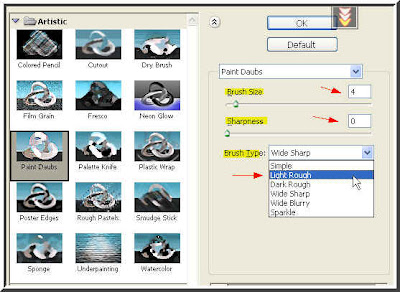
Step 16 : When the dialogue box opens, choose brush size 4, Sharpness 0 and Brush Type as Light Rough from the dropdown window. Click OK.
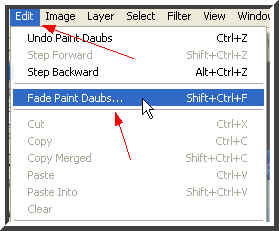
Step 17 : Now go to Edit>Fade Paint Daubs.
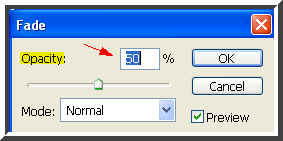 Step 18 : When the Fade dialogue box opens reduce the Opacity by50 % by dragging the slider.
And, here is the corrected image. Now try to work following the steps I have described. Do not be put off by the values as they will be different in case of your photo. But the steps will remain the same. Good luck. It is easily done.
0 comments: