(note- you need the lightning brushes for this trick, check it out at deviantart)
1) first make a background (a dark one is preferable.)

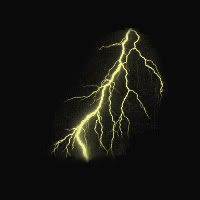
2) make a new layer, and add a lightning brush

(if you want, you can remove some of the glow and lower the opacity.)
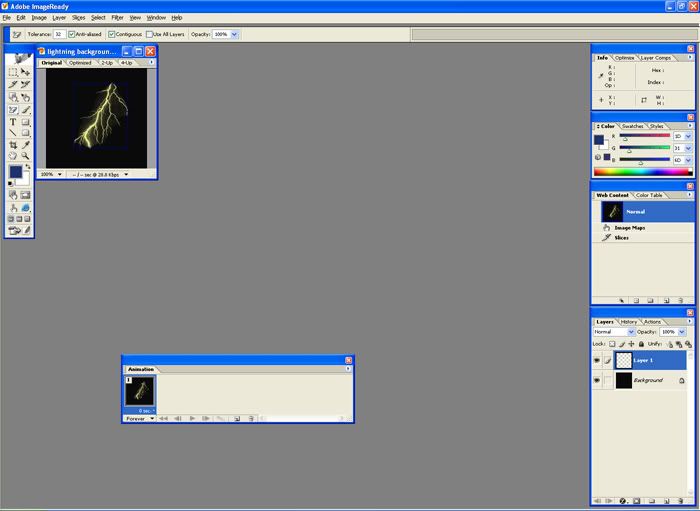
3) once your satisfied, his ctrl+shift+m to animate. Something like this should show up.

4) Then go to the animation menu. (if it doesn’t appear go to windows>animation.)

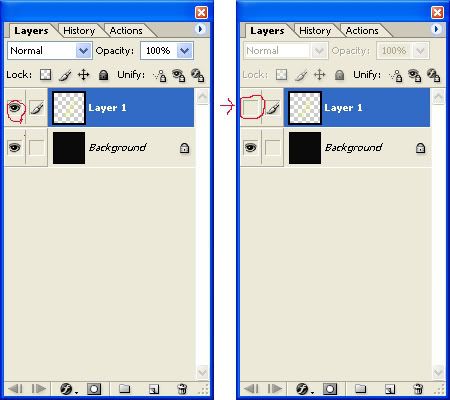
5) Then make the lightning image invisible.

6) Then duplicate the layer and make the lightning visible in that slide.

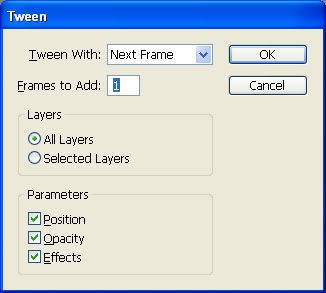
7) Duplicate the lightning layer and make it invisible. Then select the lightning slide and press the tweening button.


9) Now repeat the process, only this time make a delay of 0.1-0.3 seconds on the slide with the lightning. You should get something like this.

10) Now go back to the first slide and give it a 1-10 second delay so that it’s realistic. Press play to test it out.

Here’s what I got.

Now use that animation technique on different backgrounds and with different settings.
It is for Photoshop only, but users of other editors will get the idea.
You will need a seamless texture.
A seamless texture is a texture that you can tile without seams. A good texture to use would be a wall texture from a game. Look for seamless texture tutorials.
Make a new file 600 x 600 with a black background. It will be cropped later.

Make a new layer and fill it with your seamless texture. Resize the texture so that there are no parts of it outside your image. Name the layer "scroll".

Duplicate the layer and apply the offset filter (FILTERS>OTHER>OFFSET) with the following settings:
vertical 0
horizontal 50
Repeat until you have 12 layers plus the background.

Link the layers.

Select the topmost layer and hit CTRL+T
A frame with handles will appear around your image.
Right click inside the frame and choose perspective.

Drag one of the corners so that one of the sides (right or left) becomes smaller.
drag a corner on the opposite side so that it gets taller (it doesn't matter if it goes outside of the picture).
Hit ENTER. The frame will disappear and ALL your frames will be transformed. If the transformation didn't work on all the layers, go over the steps and find out what you did wrong.

Crop your picture to 600 x 100 (signature size).

Send your file to ImageReady. There's a button at the bottom of the toolbar that does that, or hit CTRL+SHIFT+M.
In imageready, yoou will see that your animation has already one frame.

Click the button to duplicate frame and then, in your layers, turn off the topmost layer.
repeat until you get to the last layer. You should have 12 frames.

Play the animation and tweak to taste.

Voila!
You can apply any transformation or deformation you want, or any ammount of scroll in the offset filter, just make sure it loops properly using this formula:
width = offset settings x number of frames
In this case, we have 600 = 50 x 12.
You can also do it vertically and diagonally if you're creative.
Have fun!
Few days ago, I was playing with Photoshop and ImageReady, and I came up with something really delicious :). I was trying to make an animated Display Picture or Avatar for Windows Live Messenger 9 (which supports recently animated avatars). So I mastered an amazing technique that I’m going over step by step below. Note that this is an advanced tutorial because it involves the usage of Pen Tool, Layer Mask and Tween (ImageReady). Here’s what we’ll be working on

Let’s start:
Step 1
Open Adobe Photoshop and press CTRL + N to create a new image:

Step 2
Set the background color to #000000 (black) and the foreground to #122c52.
Step 3
Filter > Render > Clouds to get something like the following:

Step 4
Select the Pen Tool, make sure the “Paths” option  is selected in the toolbar. Draw the following shape:

Step 5
CTRL + SHIFT + N to create a new layer (Layer 2).
Step 6
Select the Brush Tool, set the Foreground color to #ffffff (white), master diameter to 4px and hardness to 100%.

Step 7
Select the Pen Tool again, right click on the image and press Stroke Path…

Step 8
Set the following options in the Stroke Path dialog:

Step 9
CTRL + SHIFT + N to create the third layer.
Step 10
Select the Brush Tool again and increase the Master Diameter to 5px.
Step 11
Right click again on the image and press the stroke path. Then apply the same options.
Step 12
Hide the Layer 3 by unsetting the eye in the layers panel:

Step 13
Select the Layer 2 from the Layers panel. Then, Layers > Layer Style > Blending Options… and set the following settings (Outer Glow and Color Overlay):


Step 14
You will get something simillar to this (do not remove the pen tool selection):

Step 15
Now, we’re done with Photoshop, we’ll start editing with ImageReady:

Step 16
ImageReady will open. Window > Workplace > Default Workplace to arrange your windows.
Step 17
Window > Animation to show the animation window:

Step 18
Now, we will show the Layer 3 (that we already hided in Photoshop) by setting the eye back.
Step 19
Be careful here!!! Drag the Layer 3 in the Layers Panel to the “Add a mask” button in the bottom to create a mask of that layer. Select the Brush tool and clean up the white area in the mask. Then unset the link between the layer preview and the mask:

Step 20
Here’s the tricky part. Although it can be done in many ways, but i find this way the easiest. Select the Brush Tool (I think it’s already selected :)), set the foreground color to #ffffff (white) and select the following Brush:

Step 21
Make sure the mask is selected! draw with you free hand a line like this (Note that you will only see this line in the Mask preview in the layer panel):

Step 22
You should see in the Layers panel the following:

Step 23
Let’s start with the animation now. Press the 1st Frame in the Animation windows and press “Duplicate current frame” icon to duplicate the layers state.

Step 24
Now make sure the the mask of the layer 3 is selected, select the Move tool and Press Shirt + Right like 25 times to reach the following state:

Step 25
So, we have moved the line mask from left to right. It’s time to animate it! The frame 2 is selected, hold CTRL and click on frame 1 to make them both selected. Then press the Tween icon:

Step 26
Apply the following Tween settings:

Step 27
A set of frames will be created for you. Select the 1st frame, scroll to the end, hold SHIFT and click the last frame. You will have all the Frames selected. Click the delay drop down on any of the selected frames and choose Other:

Step 28
Enter 0.03 seconds as a delay between the frames:

Step 29
Now select the last Frame alone by clicking on it, and set its delay to 5 seconds:

Step 30
We’re done. It’s time to save the animation as gif. Make sure the format in the "Optimize" panel is GIF:

Step 31
File > Save Optimized As! ![]()
Open it with Firefox, because Firefox renders the Gif formats faster than Internet Explorer (I’m not sure about Safari or other browsers).

About Me
- satwik sharma