counter


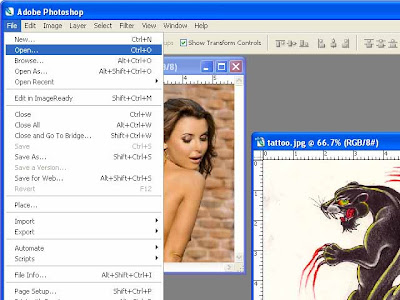
Step 2 : I have opened both the images in Photoshop by going to File>Open importing the images from a folder on my computer. (See above)

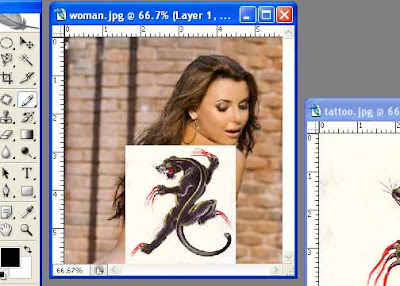
Step 3 : Now drag the tattoo (a layer) onto the lady's back (another layer).

Step 4 : But what has happened! The tattoo has covered up the lady. This happens when one of the images are larger.

Step 5 : Select the Move Tool by clicking it. I have shown where the Move Tool is located above.

Step 6 : Now grab a corner handle and resize the tattoo layer by dragging it down and moving it sideways.

Step 7 : It is just possible that the the corners handles do not appear. Just check the 'Show transform controls' in Photoshop CS 2 or 'Bounding box' located in the same place if you are using Photoshop7.

Step 8 : Since you are using only two layers there are visible as thumbnails in the Layers/Channels/Paths palette at the right bottom of Photoshop. If you cannot see it go to View at the top and check it from the drop down list.(See above)
Step 9 : I have repositioned the tattoo on the lady's back.
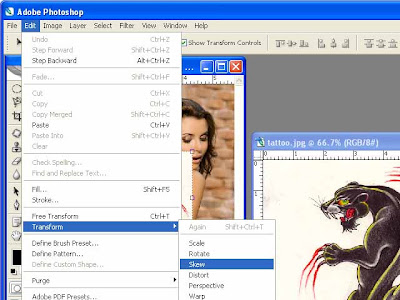
Step10 : Now go to Edit>Transform>Skew

Step 11 : Now drag the corner handles till you have resized the tattoo on her back.
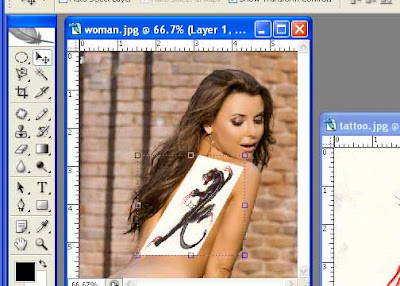
Step12 : The tattoo has been skewed and resized on the lady's back. Now for a little magic!
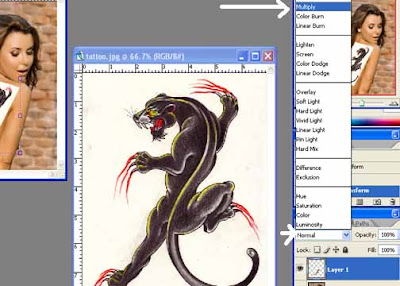
Step 13 : Go to the Layers/Channels/Paths palette and change the Blend Mode to 'Multiply' from the pop up list. By default it is 'Normal'.

Step 14 : Aha! the lady's back is tattooed. But the tattoo is too dark and also needs a little more skewing.

Step 15 : Go the Layers/Channels/Paths palette again and drag the opacity slider to the left to decrease the opacity. (see above)
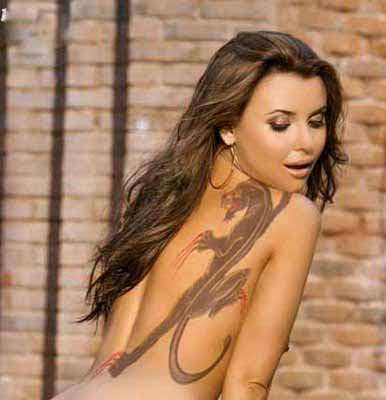
I have skewed the 'tattoo' layer a bit more and reduced the opacity to about 58 per cent. This is not fixed it will depend on the image.Now you can call yourself a tattoo artist. And, it didn't hurt the lady one bit!
0 comments: