Blog Archive
-
▼
2008
(22)
-
▼
February
(17)
- create solar eclipse in photoshop
- eclipse in photoshop
- fire effect in PS
- correcting a photo in photoshop
- fisheye effect
- add a tatoo
- adding sunburst
- Vignette with an extra tweak
- lightning in photoshop
- popup from frame wid photoshop
- swapping faces
- Making a collage from a Photo in Photoshop
- skin colour toning....
- blending 2 images in photoshop
- advanced blending
- moonset in water..
- convert a pic inta a sketch...
-
▼
February
(17)
counter
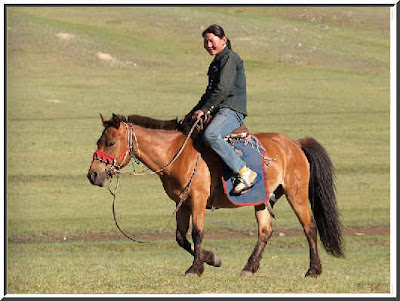
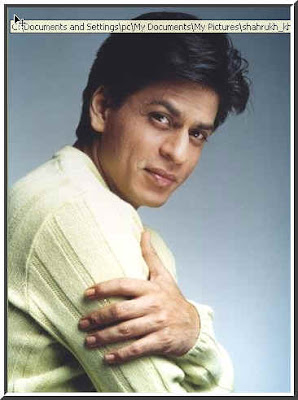
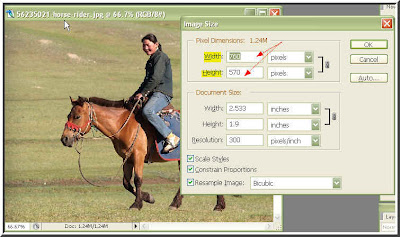
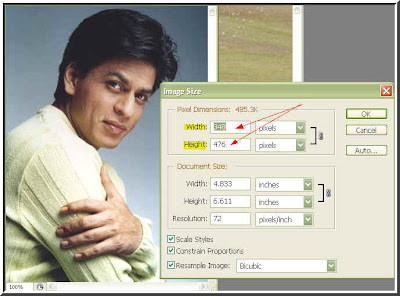
Step 2 : First open the Image Size dialogue box by pressing ALT+CTRL+I. The Height and Width of the horserider is 760 x 560 pixel and of SRK 348 x 476. The Resolution of the horse rider is 300 pixels/inch and of SRK 71 pixels/inch.
Note : If there is a great difference in the size of the images you might face trouble moving them around. It is easier to make the dimensions of both roughly equal.
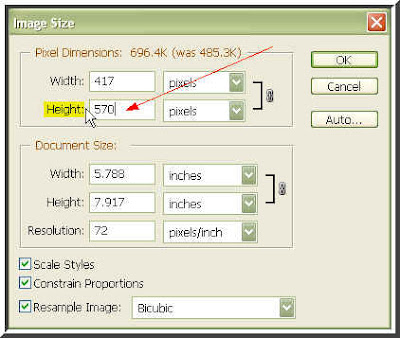
Step 3 : I am therefore increasing one of the parameters i.e. Height of the SRK image to 570. Now we can go ahead.
 Step 4 : Now select the Magnetic Lasso Tool or the Pen Tool, whichever you find easier to handle. I, however, suggest the Pen Tool (here is the tutorial). You can cut very precisely with the Pen Tool as you can zoom in and select. You cannot zoom in and select in the case of the Magnetic Lasso Tool.
 Step 5 : Here I am using the Magnetic Lasso to click around SRK's face to make a selection. Once you come back to the point where you first started the selection will change into a column of 'marching ants'.
 Alternately, Here I am selecting with the Pen Tool by zooming in. This allows me select very precisely.
  Step 6 : I have completed the path by clicking around the face with the Pen Tool.
 Step 7 : Now click the Paths (see arrow) in the Layers/Channels/Paths pallette.
 Step 8 : Now you can see the 'Workpath' in the Paths dialogue box.
 Step 9 : Right Click the Workpath. When you click the above dialogue box opens. Click 'Make Selection'.
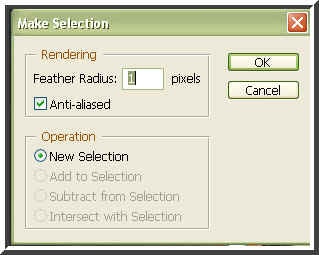
Step 10 : This dialogue box opens. Make sure that 'New Selection' is selected. By default it should show you this. Click ok.
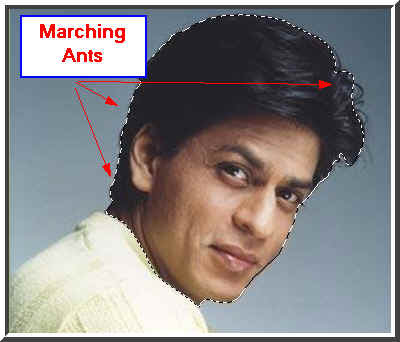
Step 11 : Now you can see the selection.
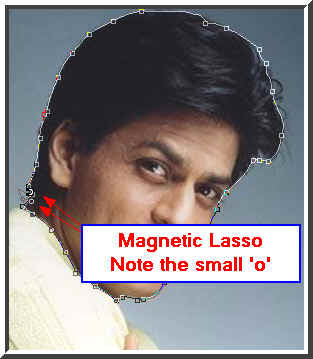
Alternately you can make the selection with the Magnetic Lasso Tool. Note that a small 'o' forms near the Magnetic Lasso Tool as you come back to the point you originally began clicking.This indicates that the path is about to be closed and you should close it by clicking on the first point that you began. NOTE should you make a mistake in clicking a point, hit DELETE key on your keyboard. The point will be deleted and you can continue clicking.
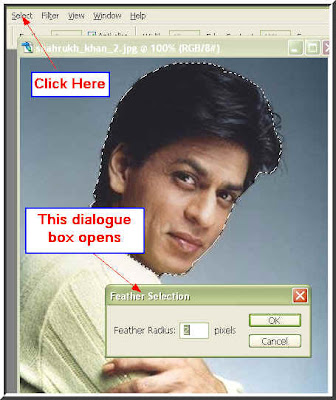
Now go to Select at the top as shown by the red arrow and click Feather from the drop down box. Put 2 pixels as Feather radius. Click ok.

Step 12 : Click the Move Tool. Step 13 : Keeping the SHIFT key pressed I have dragged SRK's face onto the horse rider photo.
Step 14 : Notice that SRK's face faces the other way from the horse rider's. That has to be fixed. Go to Edit>Transform>Flip Horizontal.
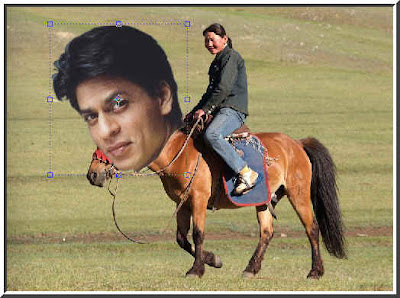
Step 15 : Now you can see that SRK's face is facing the same direction as the horse rider.

On the top panel make sure 'Show Transform Controls' is checked. In PS 7 it is known as 'Bounding Box' and found in the same place.
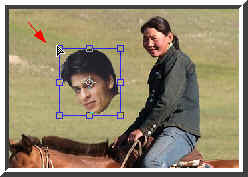
Step 16 : Keeping the SHIFT key pressed I have resized SRK's face by dragging the corner handles though it is still too big.

Step 17 : Click the Zoom tool because we need to see the horserider's face in close up. Step 18 : Now click on the 'Background' layer to select it. The horse rider's photo is on that layer, while Layer 1 contains SRK's face. You will need to switch between the two layers.
Step 19 : Here I have zoomed in on the horse rider's face. TIP use the bracket [ ] keys on your keyboard to zoom in and out.

Step 20 : Keeping the SHIFT key pressed I have resized SRK's face onto the horse rider.
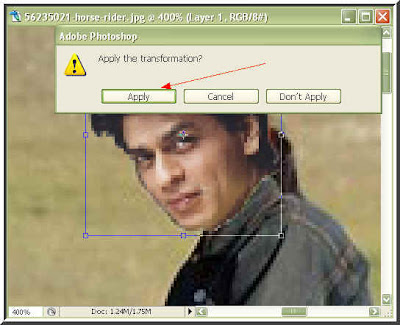
Step 21 : Click the Move Tool or any other tool to apply the transformation. Click Apply in the dialogue box. Step 22 : Zoom in further. Notice where the red arrows point to. The blending is not proper.

You can use the bracket keys for zooming in or out or the magnifying glass icons with the plus and minus signs at the top left panel for doing so.
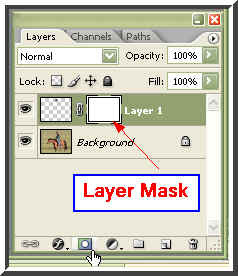
Step 24 : Click the Layer Mask button where the small white hand points to and the layer mask forms shown by the red arrow on SRK's face layer. Step 25 : Click the Brush Tool.
 Step 26 : First click where the white arrow points to it. It will reveal this dialogue box. You should set the hardness at 100 % , but the Master Diameter should be set according to your need. A quick way to make the brush tip smaller or bigger is by using the bracket keys [ ] on your keyboard.
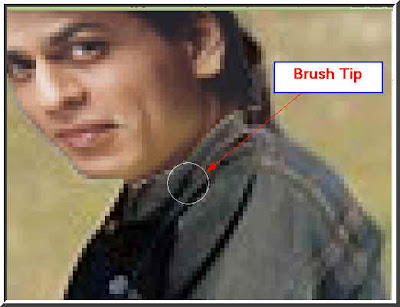
Step 27 : Now bring the brush to the image.
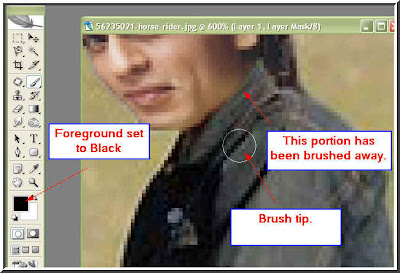
Step 28 : The Foreground is set to black. With the Brush Tool delicately brush away around the collar. If you go wrong change the Foreground color to White. Brush back what you have painted out. Click the small bent arrow to switch between the Foreground and Background colors.
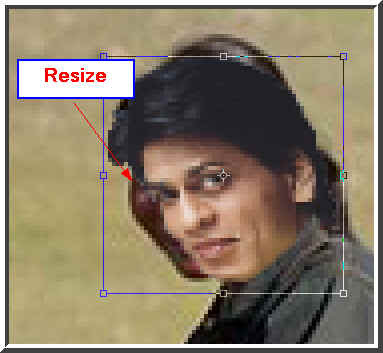
Step 29 : SRK's face is still a bit large. Resize it further. But this makes the face of the horseman behind show at the sides. First Click on the Move Tool to Apply the transformation then go to the Layers/Channels/Paths pallette.

Step 30 : Now click back on the Background Layer to select it.
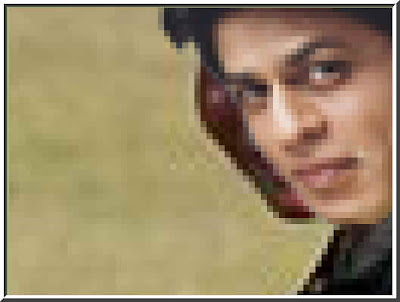
Step 31 : Now zoom in again on the face. You can easily make out the side of the horseman below SRK's face. Now choose the Clone Stamp Tool.

Step 32 : Click the Clone Tool from the flyout. To increase or decease the size of the tool tip use the bracket [ ] keys on your keyboard. Step 33 : ALT+Click to select the area from which you will clone. I have already clicked on an area.
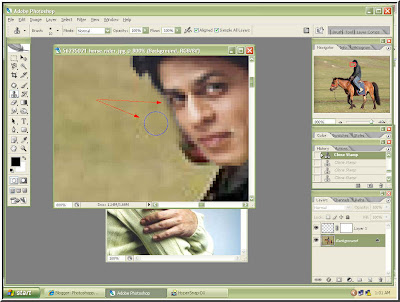
Step 34 : You can see that as I click the horesman's face behind SRK's disappears.
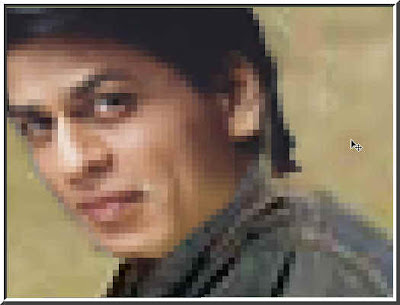
Step 34 : Notice that the horseman's face showing behind SRK's has been cloned away. Now zoom out.

And there you are it's SRK who is riding the horse now. That's all. Save your work by going to Layer>Flatten Image.Then go to File>Save as. Save as Jpeg.
About Me
- satwik sharma
0 comments: