counter

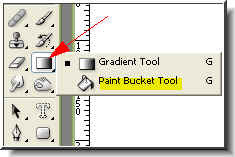
Step 4 : Click the Paint Bucket Tool. Now fill the white layer with the color.
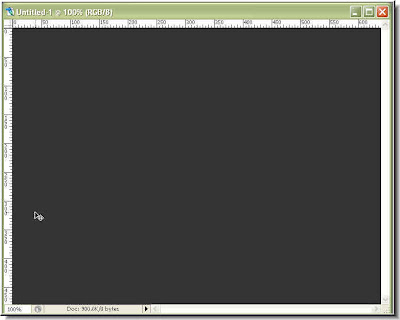
Step 5 : The white layer has been filled.
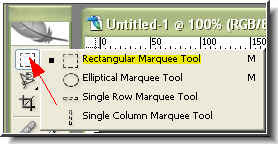
Step 6 : Click the Rectangular Marquee Tool to select it.

Step 7 : The selection has been made.

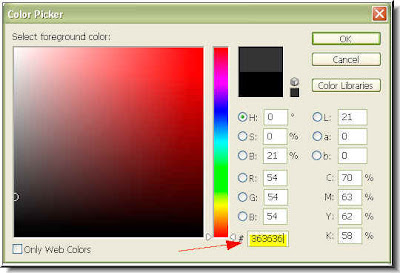
Step 8 : Click the Foreground color again.

Step 9 : Put FFC001 where the red arrow points to. Click ok.

Step 10 : Now click the Background color (red arrow).
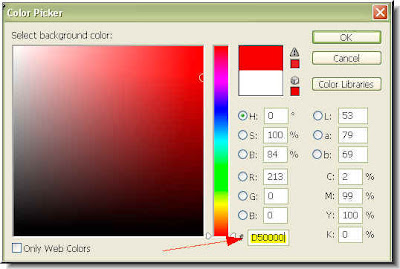
Step 11 : When the Color Picker dialogue box opens place D50000 in the box shown by the red arrow. Click ok.
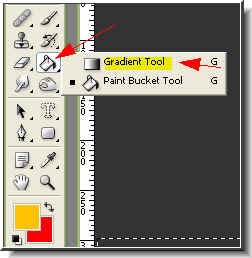
Step 12 : Click the Gradient Tool to select it.
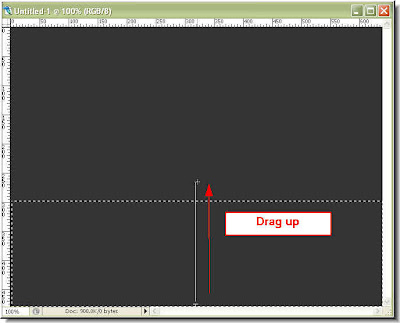
Step 13 : Now drag up from the bottom of the selection upwards as shown.
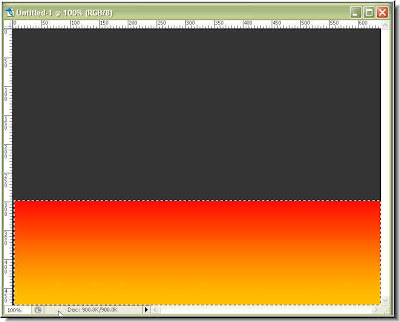
Step 14 : This is how the gradient looks. Press CTRL+D on your keyboard to deselect.

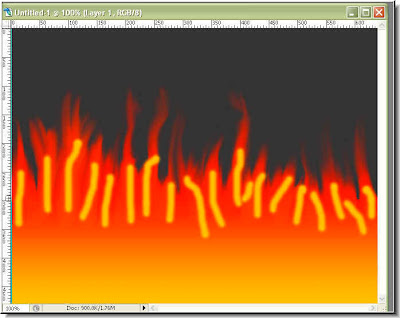
Step 15 : Click on the Brush Tool at the top and set the Master Diameter at 30 pixel and Hardness to to 85 %.
Step 16 : Press 'R' on the keyboard which will bring up the Smudge Tool. Now drag up with the Smudge Tool as shown.

Step 17 : The flames, but not quite finished.

Step 18 : Go the Layers/Channels/Paths pallette and click the New Layer icon (shown by the small white hand and red arrow). The new Layer -- Layer 1 forms (blue arrow).

Step 18 : Again click on the Brush Tool. Set Opacity at 100 % and set the Diameter and Hardness suitably. It will depend on the size of your canvas.
Step 19 : Draw yellow lines as I have done above. Now press 'R' on your keyboard to bring up the Smudge Tool.
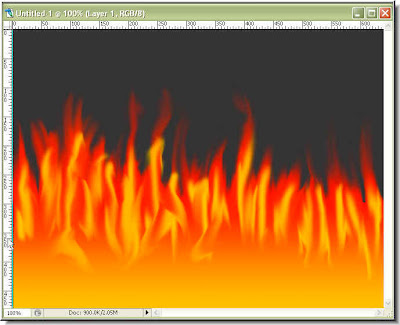
Step 20 : Use the Smudge Tool to smudge the yellow streaks as I have done.
Step 21 : Select the Burn Tool. The blue arrow shows the Smudge Tool. I used a shortcut in the above steps to bring it up. But here we will use the Burn Tool.
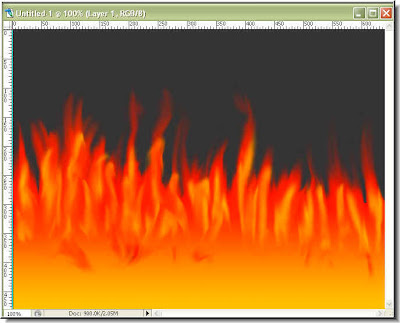 Step 22 : Use the Burn Tool to 'burn' the yellow streaks. The finished flames.
0 comments: