counter
Tuesday, February 12, 2008
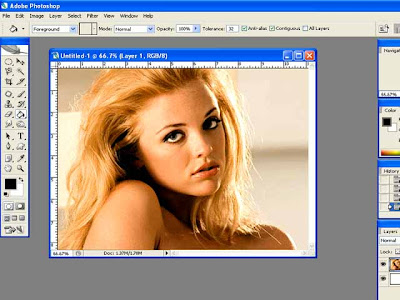
I have opened this image in Photoshop. You can open your own.
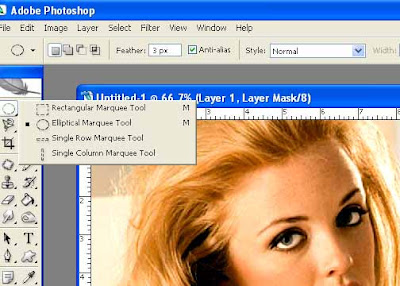
Click the Circular Marque Tool and draw a circular selection. Keep the Shift key on your keyboard pressed to draw a perfect circle.
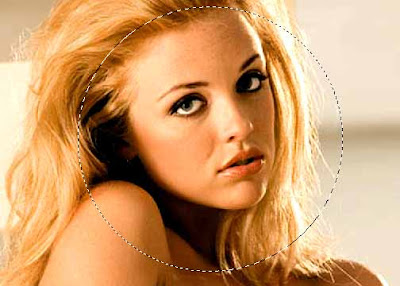
Step 3 : The Circular Marque has been drawn.
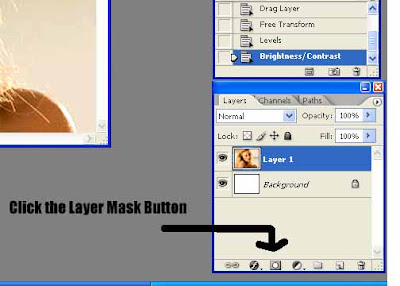
Step 4 : Click the Layer Mask button. The Black arrow shows where the button is on the Layers Pallete at the right bottom of Photoshop.

Step 5 : This is how the image looks after applying the Layer Mask.
Step 6 : Now go to Layers>Blur>Gaussian Blur
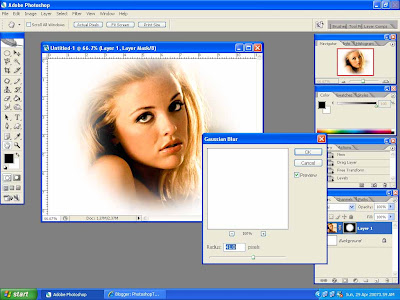
Step 7 : Now drag the slider at the bottom of the dialogue box to set the amount to blur. You can see the effect on the image simultaneously.
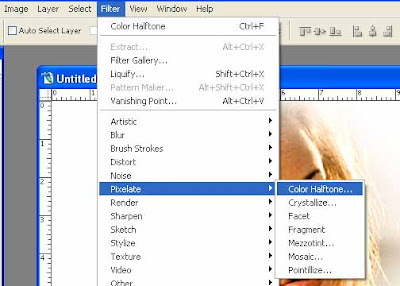
Step 8 : Go to Filter>Pixelate>Color Halftone
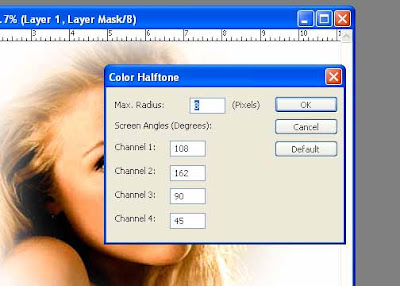
Step 9 : This dialogue box will open. Click ok.
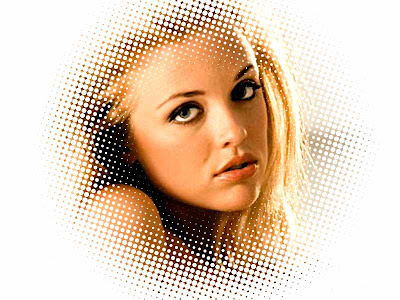
Step 10 : And here is your completed image. Go surprise you friends with your expertise.
Subscribe to:
Post Comments (Atom)
0 comments: