Blog Archive
-
▼
2008
(22)
-
▼
February
(17)
- create solar eclipse in photoshop
- eclipse in photoshop
- fire effect in PS
- correcting a photo in photoshop
- fisheye effect
- add a tatoo
- adding sunburst
- Vignette with an extra tweak
- lightning in photoshop
- popup from frame wid photoshop
- swapping faces
- Making a collage from a Photo in Photoshop
- skin colour toning....
- blending 2 images in photoshop
- advanced blending
- moonset in water..
- convert a pic inta a sketch...
-
▼
February
(17)
counter
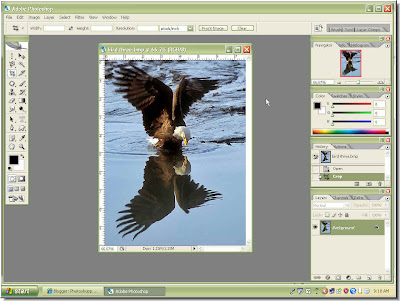
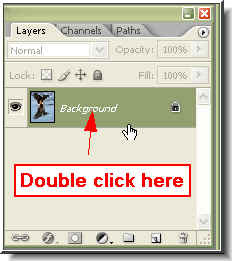
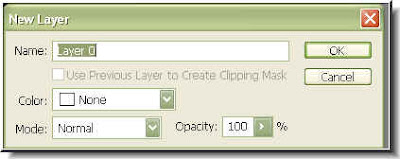
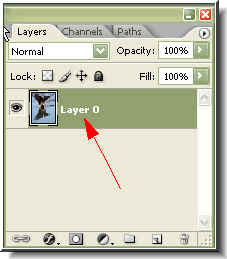
Step 4 : You will now find that the the 'Background' has changed to Layer 0 (zero). A 'Background' layer cannot be edited. Now it is editable as Layer 0.
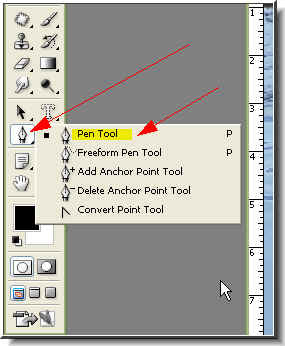
Step 5 : Now select the Pen Tool from the flyout by clicking it.
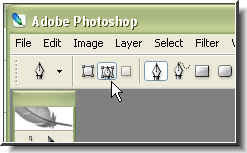
Step 6 : Click the icon in the top panel where the white arrow points to.
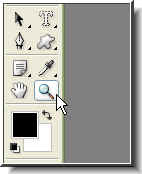
Step 7 : Now click the Zoom Tool.
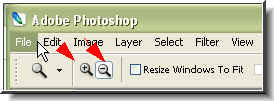
Step 8 : See the magnifying glass icons with the plus and minus signs. The one with the plus sign zooms in i.e. magnifies the image. The one with the minus sign zooms out i.e. reduces the image size. You have to click on them for zooming in or out. You can also use a keyboard shortcut. The two [ ] bracket keys for zooming in and out.
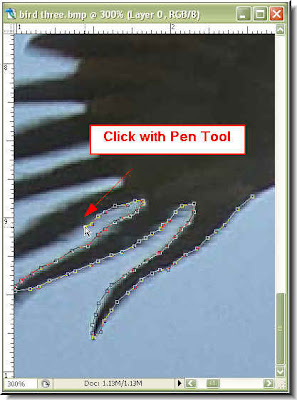
Step 9 : I have zoomed in on the image and have begun selecting with the Pen Tool by clicking on the feathers of the eagle. The advantage of the Pen Tool is that you can zoom in and select. This is not possible with the 'Lasso' tools.
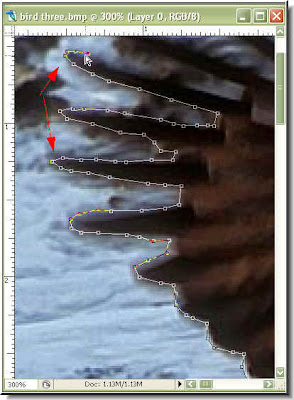
Step 10 : I am continuing to select with the Pen Tool. With the Pen Tool you can make an exact selection, unlike the 'Lasso' Tools. It requires patience to select with the Pen Tool, but it pays off. Go on clicking till you come back to where you began. This will complete the path.
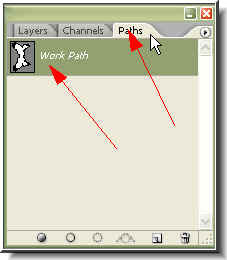
Step 11 : Now click the 'Paths' in the Layers/Channels/Paths dialogue box. You will see the 'Work Path'.
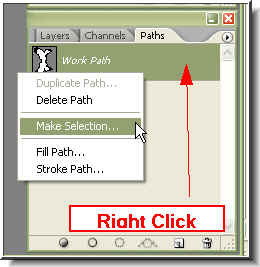
Step 12 : Now right click where shown by the red arrow and this dialogue box will open. Click on 'Make Selection'.
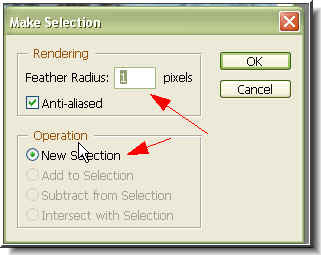
Step 13 : When this dialogue box opens make sure that 'New Selection' is selected. Click ok.
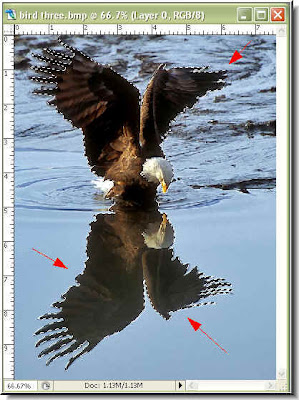
Step 14 : You will now see a column of 'marching ants' around the selection. The path has been converted into a selection.
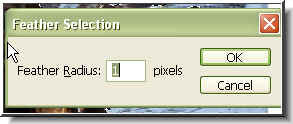
Step 15 : Now press CTRL+ALT+D on your keyboard. This dialogue box will appear. Feather Radius should be set to to '1' or '2' pixels.
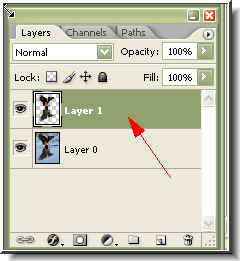
Step 16 : Now press CTRL+J on your keyboard and you will find that the selection has been cut and pasted into another layer -- Layer 1.
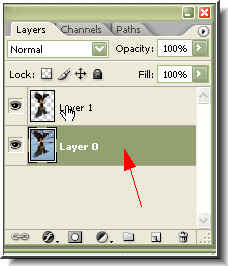
Step 17 : Now click back on Layer o (zero).
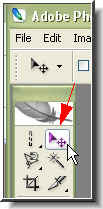
Step 18 : Now click on the Move Tool.
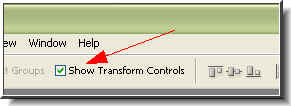
Step 19 : Make sure that 'Show Transform Controls' is ticked. This is Photoshop CS 2. In Photoshop7 you will found 'Bounding box' in the same place. Make sure that it is checked.
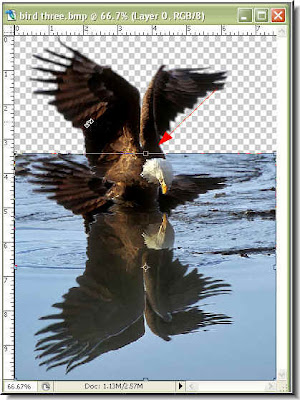
Step 20 : Now with the SHIFT key pressed on your keyboard use the Move Tool to drag down the Layer 0 as shown.
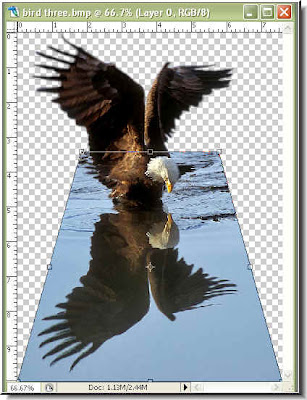
Step 21 : Now Press CTRL+SHIFT+ALT on your keyboard. Drag either the right or left corner handle at the top towards the middle. You will find the image will look like as above.
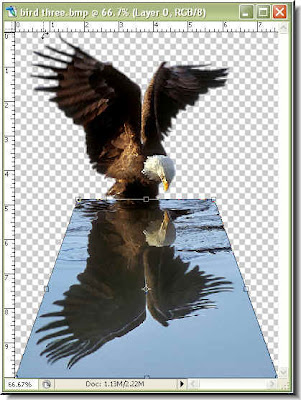
Step 22 : Now Press CTRL+T on your keyboard and drag down from the middle as shown above.

Step 23 : To apply the transformation click on the Move Tool or any other tool and this dialogue box will pop up. Click 'Apply'.
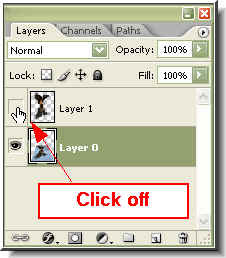
Step 24 : Now click off the 'eye' icon in 'Layer 1'.
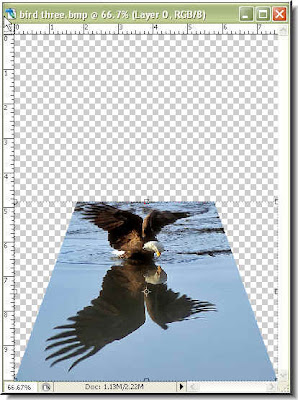
Step 25 : This is how the image looks like after the 'eye' icon is clicked off.
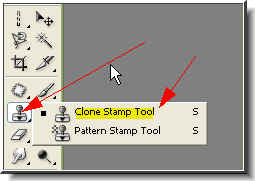
Step 26 : Now select the Clone Stamp Tool from the flyout. Click to select it.
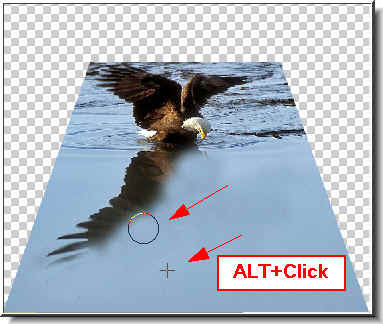
Step 27 : Now press ALT and click. I have pressed ALT and clicked on the blue in the image. The plus sign appears where you click. The cursor appears as a round circle. You can make it bigger or smaller withthe [ ] (bracket) keys. Notice that the wings of the eagle are disappearing as I clone.
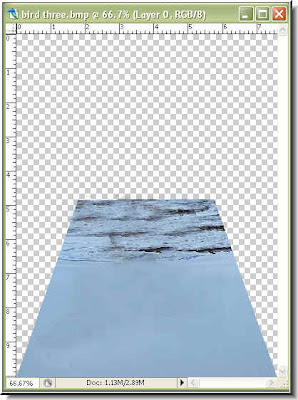
Step 28 : The eagle is no longer visible. It has been cloned away.
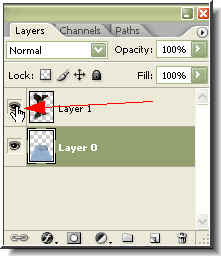
Step 29 : Now click back the 'eye' icon on Layer 1.
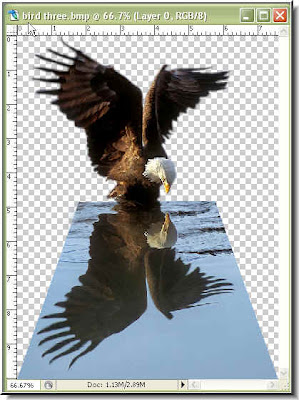
Step 30 : The eagle reappears dramatically poised over the waters.
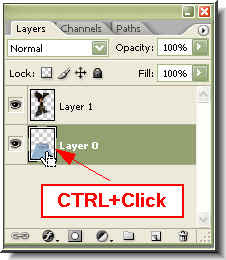
Step 31 : Now CTRL+Click on the layer thumbnail in Layer 0.

Step 32 : As soon as you CTRL+Click a selection of marching ants appear. See above.

Step 33 : Go to Select>Modify>Border as shown above.
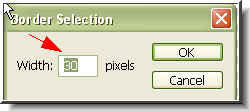
Step 34 : This dialgoue box appears. I have set 30 as the 'Width'. You can choose less depending on your image.
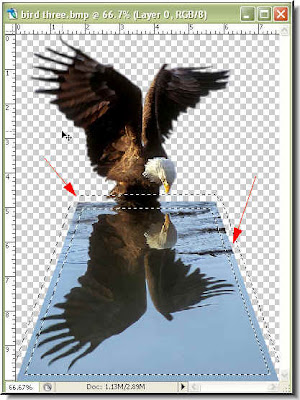
Step 35 : Now you have two sets of 'marching ants' like a border.
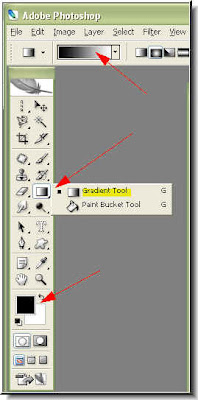
Step 36 : The Gradient Editor (top arrow) is set from black to white, the foreground color is set to black and background black (bottom arrow). Now click the Gradient Tool (middle arrow).
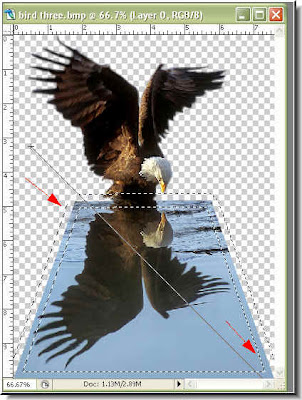
Step 37 : Drag from right left to bottom right as shown with the Gradient Tool.
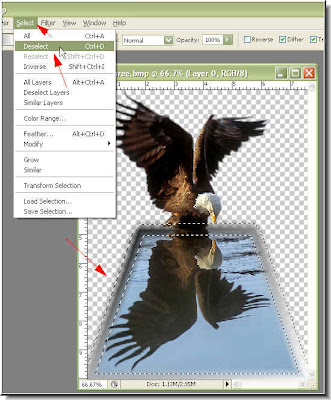
Step 38 : Go to Select>Deselect. This will get ride of the 'marching ants 'selection.
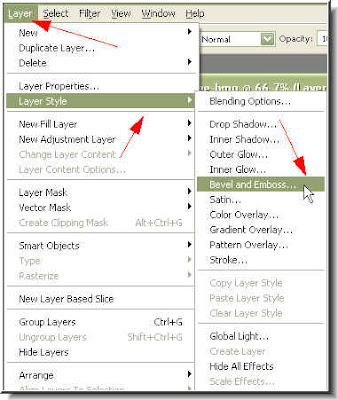
Step 39 : Go to Layers>Layer Style>Bevel and Emboss as shown above.
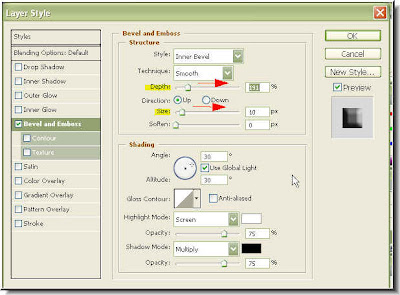
Step 40 : When the Layer Style dialogue box opens drag the 'Size' and 'Depth' sliders suitably.
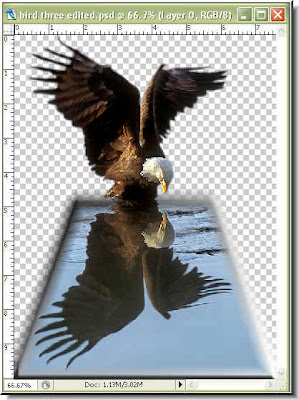
Step 41 : This how the image now looks.
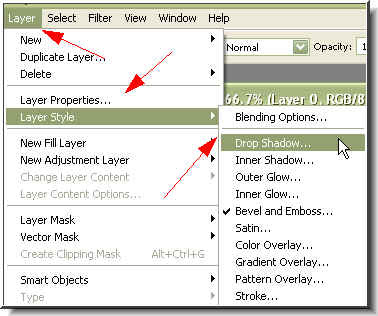
Step 42 : Go to Layers>Layer Style>Drop Shadow.
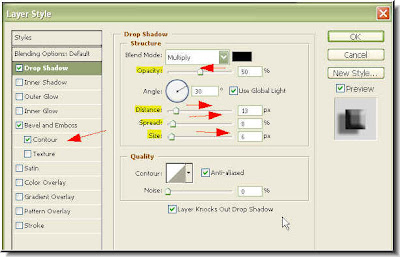
Step 43 : When the Layer Style dialogue box opens rag the 'Distance', 'Spread' and Size' slider and reduce 'Opacity' to 50 person.

Step 44 : Now click on Layer 1 to select it.
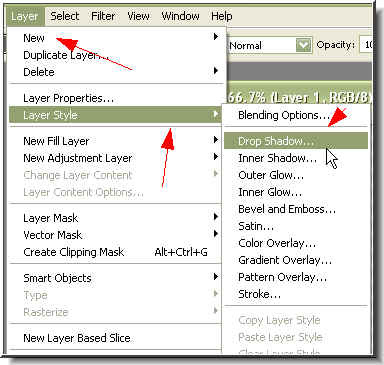
Step 45 : go to Layers>Layer Style>Drop Shadow.
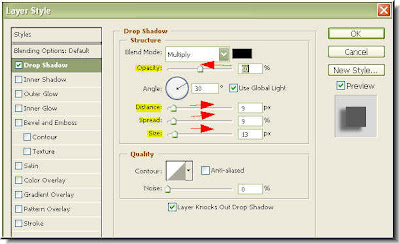
Step 46 : This dialogue box opens i.e. 'Layer Style. Again drag the 'Distance' 'Spread' and 'Size' sliders slightly towards the right. Drag the Opacity to left to 50%

Step 47 : Go to File>New to open a new layer.
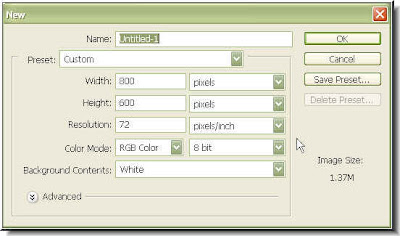
Step 48 : When this dialogue box opens set a preset and click ok. I have chosen Width 800 and Height 600.
Step 49 : Drag the new white layer onto the other image with the Move Tool

Step 50 : After dragging the white layer onto the image, press ALT on your keyboard and drag up with the Move Tool.

Step 51 : The white layer now completely covers the image. Click on the Move Tool or any other tool and the above dialogue box will open. Click 'Apply'.
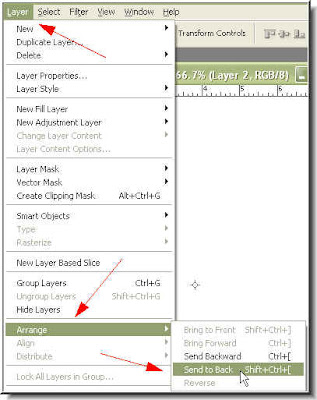
Step 52 : Go to Layers>Arrange>Send to Back.
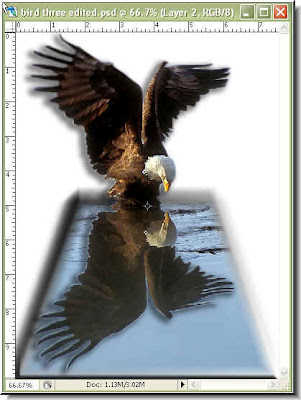
Step 53 : This how the image looks. (I wish I had used a smaller border). Now as in Step 36 and Step 37, apply a gradient to the white layer. Bu this time drag from bottom to top.

The finished image.
About Me
- satwik sharma
0 comments: