counter
Tuesday, February 12, 2008
Here is a simple way to create a lightning effect for addition as background. This can be done in both Photoshop CS 2 and Photoshop7
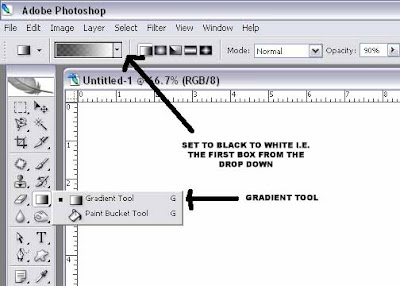
Step 2 : Click the Gradient Tool. The default setting is Black to White. If it is not click the first box from the drop down menu shown with the arrow.


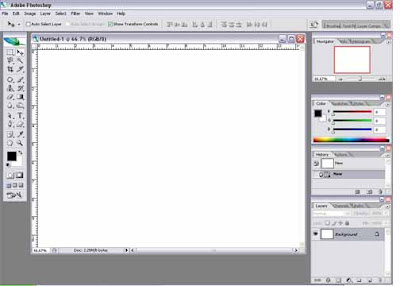
Step 1 : I have opened a blank white document. I intend to create lightning streaks which I can use as a background for some other image.
Step 2 : Click the Gradient Tool. The default setting is Black to White. If it is not click the first box from the drop down menu shown with the arrow.
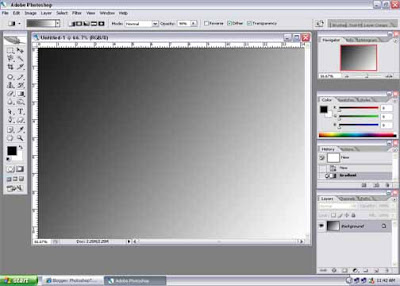
Step 3 : With the Gradient Tool selected drag from top left to right bottom. You will get the above effect.
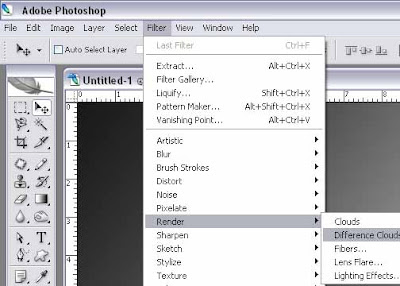
Step 4 : Go to Filter>Render>Difference Clouds as shown above.
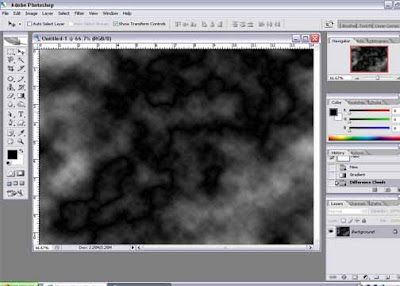
Step 5 : This will be the result after clicking Difference Clouds.

Step 6 : Hit CTRL+I on your keyboard to invert. This is what you will get. The lightning streaks are now visible.
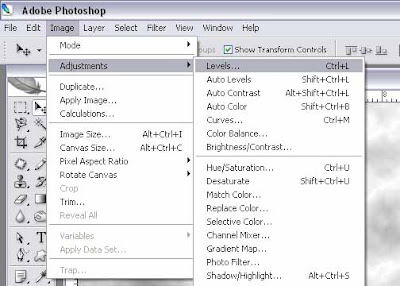
Step 7 : Now go to Image>Adjustments>Levels

Step 8 : When the above dialogue box opens drag the slider shown to the right.
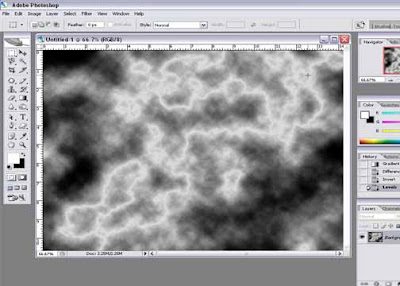
Step 9 : This is the result.

Step 10 : Now go to Image>Adjustments>Hue/Saturation as shown above.

Step 11 : When this dialogue box opens check the Colorize box as shown. This will add color to the image.

Step 12 : Now drag the Hue slider to the Right. You can fiddle with the Saturation and Lightness sliders too for darkening or making the image bright.
Step 13 : And the lightning is complete.
Subscribe to:
Post Comments (Atom)
0 comments: