counter
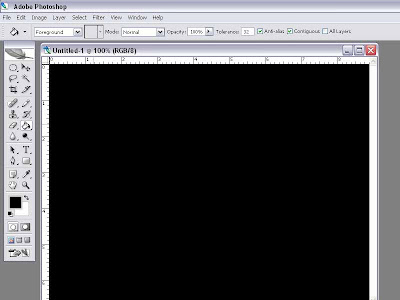
 Step 1 : Open a New 640 x 400 pixel document by going to File>New.
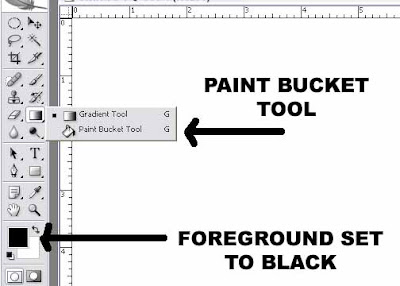
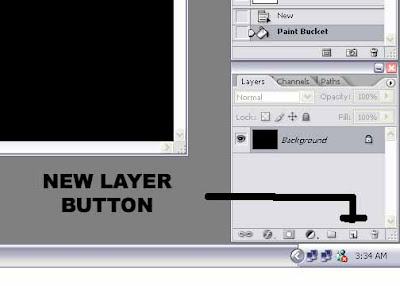
Step 4 : Click the New Layer Button shown. It will create a new layer.
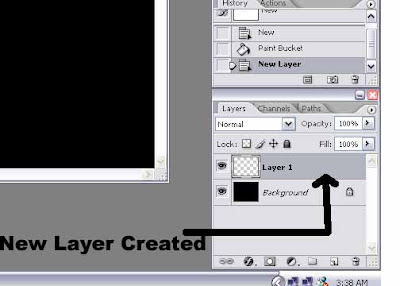
Step 5 : The New Layer has been created.
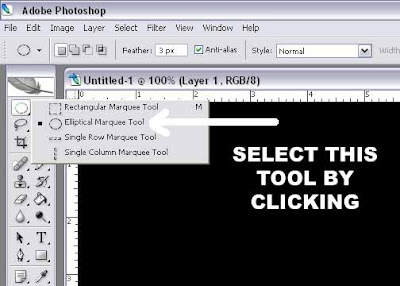
Step 6 : Select the Elliptical Marque Tool by clicking it.

Step 7 : Press Shift on the keyboard and drag. A perfect circle will be created.

Step 8 : Now set the Foreground Colour to White. Clicking on the small arrow switches between the Foreground and Background colour. Select the Paint Bucket Tool again.
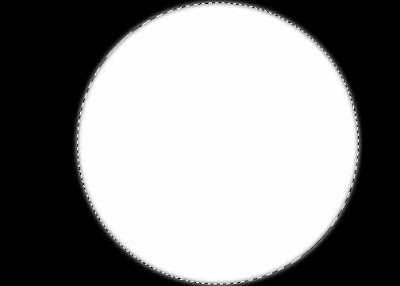
Step 9 : This is how it should look after filing the circle with White.
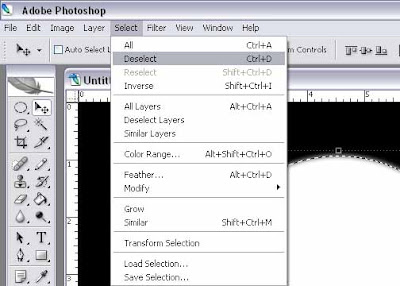
Step 10 : Go to Select>Deselect to deselect the Elliptical Marque Tool

Step 11 : The Opacity and Fill Sliders are in the Layers/Chanels/Paths pallette at bottom right of Photoshop. Drag the Fill slider to the extreme left. This will cause the white circle to disappear.

Step 12 : Go to Layer>Layer Style>Outer Glow as shown.
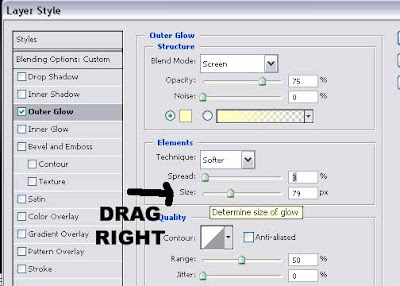
Step 13 : Drag the Size Slider to the right after this dialogue box opens. There is no hard and fast rule how much you should drag. It should satisfy you.
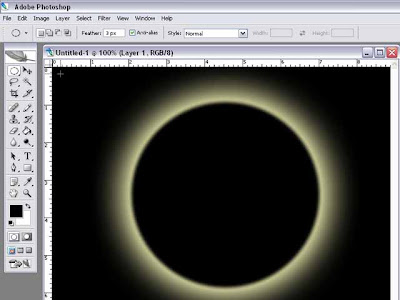
Step 14 : This is how it should looks after clicking OK. Now REPEAT this step.

Step 15 : This is how it look after repeating the above step. The glow is more diffused now.
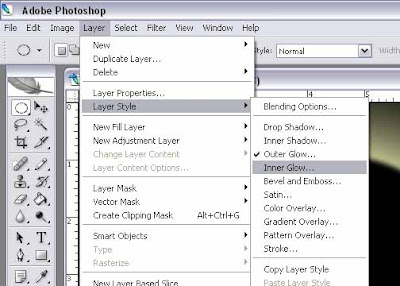
Step 16 : Now go to Layer>Layer Style>Inner Glow

Step 17 : In the dialogue box which opens drag the Size slider to the right till you are satisfied with the result. Click OK.

Step 18 : Now go to Layers/Channels/Paths pallete. Press SHIFT on the keyboard to select both Background and Layer 1.

Step 19 : Now right click as shown. It will bring up the dialogue box as shown. Click MERGE LAYERS.
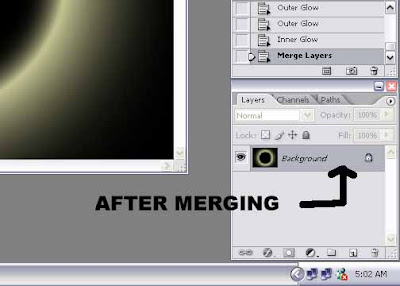
Step 20 : The Layers have been merged.
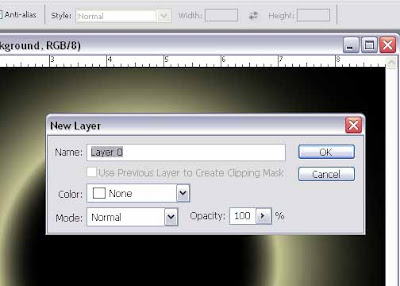
Step 21 : Now click the New Layer Button. It will create a new layer as shown.

Step 22 : Double click the background. The background layer cannot be edited. Therefore double click it to make a copy of it.
Step 23 : This dialogue box opens click OK.

Step 24 : Now drag Layer 1 below Layer 0 as shown. Now Fill Layer 1 with Black using the Paint Bucket Tool.

Step 25 : Now click Layer 0 and click the Quick Mask button. It will create a Quick Mask on Layer 0.

Step 26 : Now click the Gradient Tool shown above.
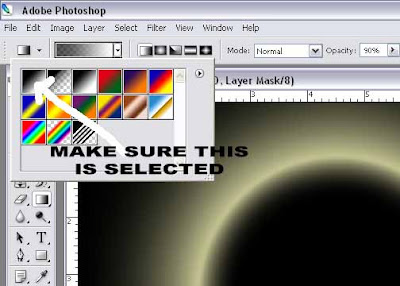
Step 27 : Make sure the Black to White gradient is selected. You can select it by clicking it if it is not selected.
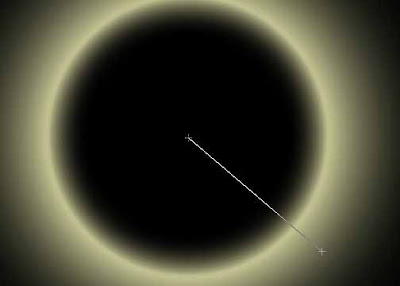
Step 28 : Now drag the Gradient Tool from the bottom right to the middle as shown.
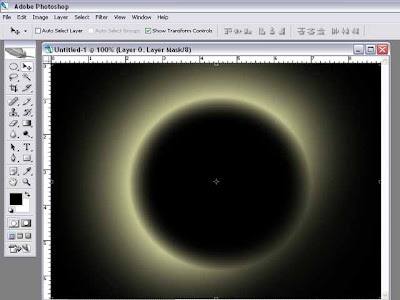
Step 29 : This is how it looks after applying the gradient. A few more steps remain. Just be patient.

Step 30 : Now just as in Step 18 and 19 select both the layers by clicking on the layers while pressing SHIFT key. Then Merge both layers.

Step 31 : Now go to Filter>Render>lens Flare.

Step 32 : When the above dialogue box opens choose 50-300mm Zoom. The first one and click ok. That is all.
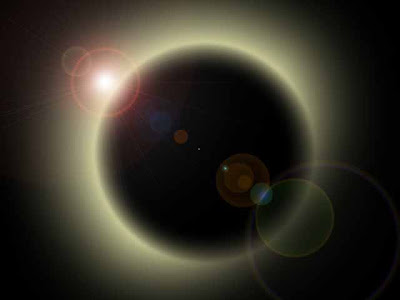
This is the completed image. Have fun.
0 comments: