Blog Archive
-
▼
2008
(22)
-
▼
February
(17)
- create solar eclipse in photoshop
- eclipse in photoshop
- fire effect in PS
- correcting a photo in photoshop
- fisheye effect
- add a tatoo
- adding sunburst
- Vignette with an extra tweak
- lightning in photoshop
- popup from frame wid photoshop
- swapping faces
- Making a collage from a Photo in Photoshop
- skin colour toning....
- blending 2 images in photoshop
- advanced blending
- moonset in water..
- convert a pic inta a sketch...
-
▼
February
(17)
counter
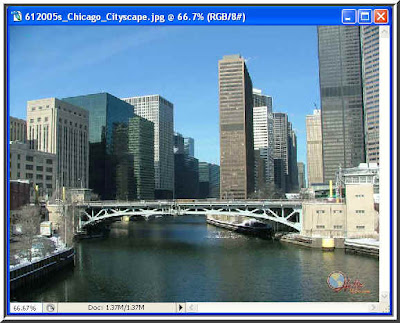
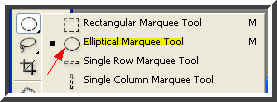
Step 2 : Click the Elliptical Marquee Tool from the flyout.
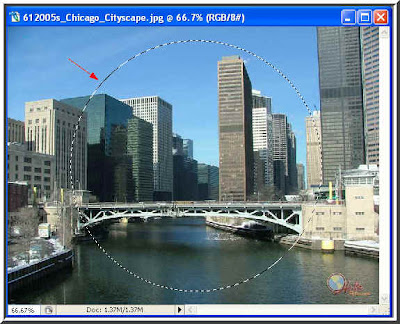
Step 3 : Press SHIFT on the keyboard and you will be able to draw a perfect circle with the Elliptical Marquee Tool.
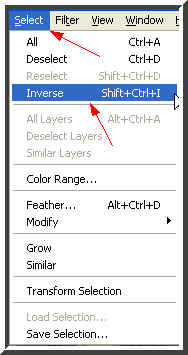
Step 4 : Go to Select>Inverse.
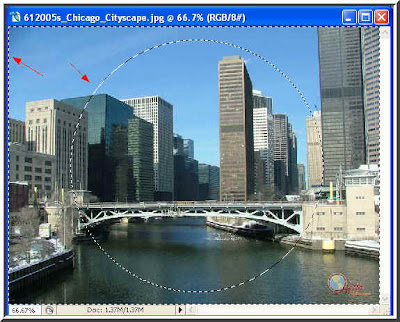
Step 5 : The selection has been inversed. Now hit the DELETE key on the keyboard.
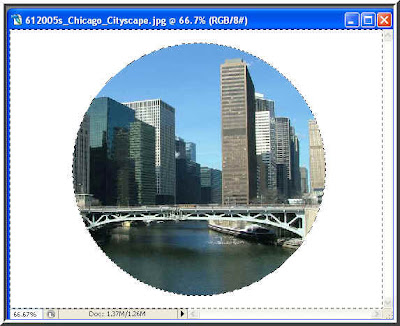
Step 6 : This is what you get.
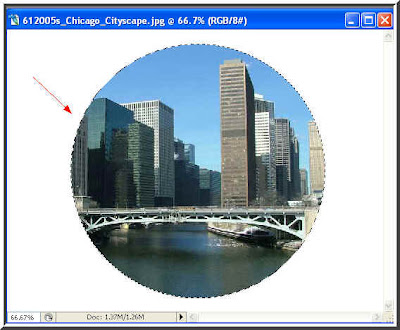 Step 7 : Pres SHIFT+CTRL+I on the keyboard and you will be left with the circle only selected.
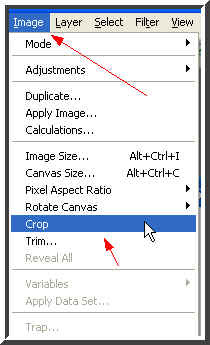
Step 8 : Go to Edit>Crop.
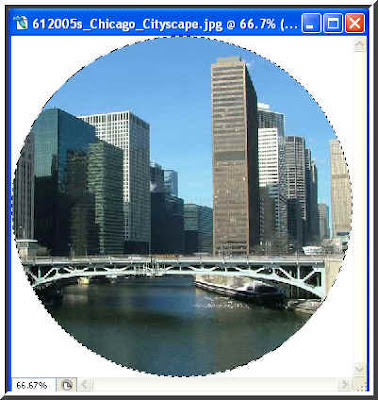
Step 9 : This is what you get.
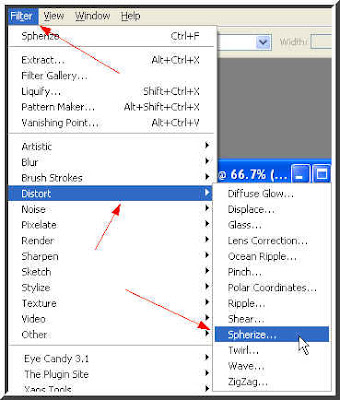
Step 10 : Go to Filter>Distort>Spherize.
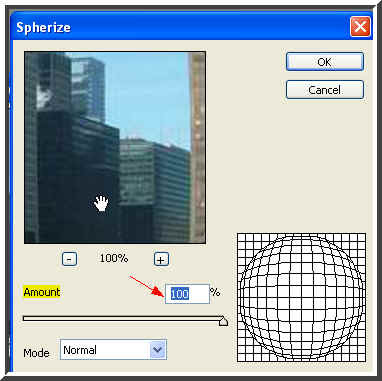
Step 11 : Set the Amount to 100 % and Mode to Normal. Click ok.
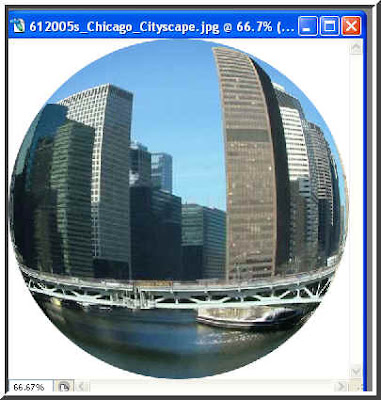
And here is your Fish Eye. You can add a background to it if you like.
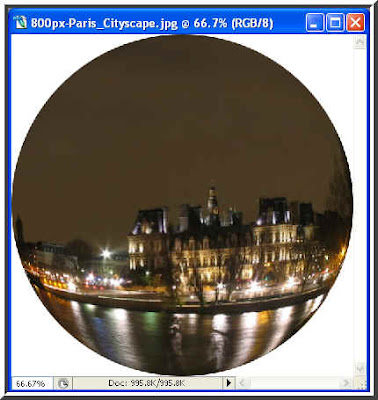
Step 1 : Here is another Fish Eye image I have created as shown above. Let us add a background to it. It is easily done.
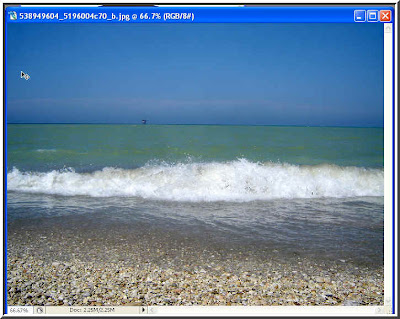
Step 2 : Here is the background I have chosen.
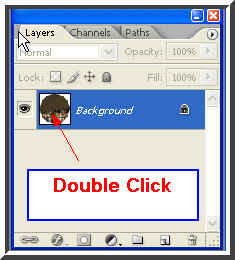
Step 3 : Double click the layer (red arrow) in the Background of the photo you converted to fish eye by going to the Layers/Channels/Paths dialogue box.
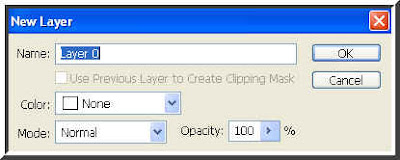
Step 4 : This dialogue box opens. Click ok.
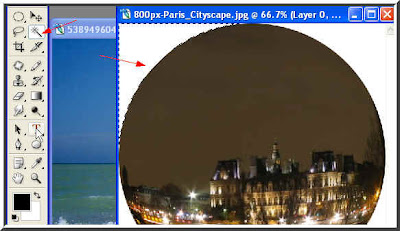
Step 5 : Now click the Magic Wand Tool (top red arrow) and click on the white portion of the image on the top left corner. The top let corner will be selected.
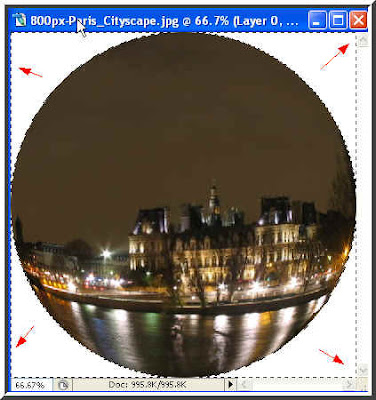
Step 6 : Keep the SHIFT key pressed and touch all the three other white corners with the Magic Wand Tool. The entire white portion is now selected.
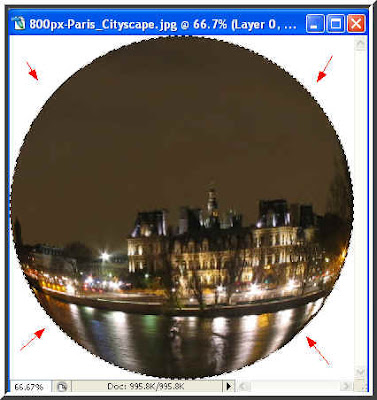
Step 7 : Now press CTRL+SHIFT+I and you will find that only the circle is now selected.
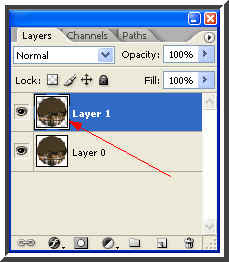
Step 8 : Now press CTRL+J on your keyboard. You will immediately notice a new layer -- Layer 1.
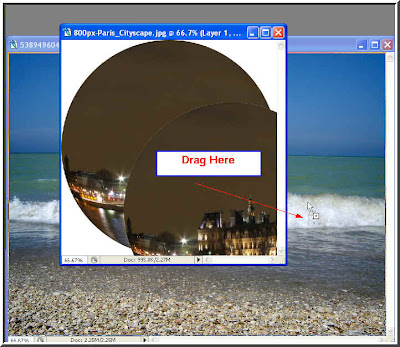
Step 9 : Use the Move Tool to move the circular image onto the photo chosen as background. Keep the Shift Key pressed. This will make the circular image land right in the middle of the background image.

Step 10 : This is the Move Tool if you did not know (white arrow).

And here is your fish eye photo on a background. And right in the middle too.

You can try another effect too.
Step 1 : CLick the Add Layer Mask button (shown by the little white and and the blue arrow). Click it and you will find the layer mask will form (red arrow).

Step 2 : Click on top which will bring up the brush dialogue box. Choose the Master diameter at 68 % and set the Hardness to 66 %. Move the sliders (green arrow).

Step 3 : This is Brush Tool if you did not know (green arrow)
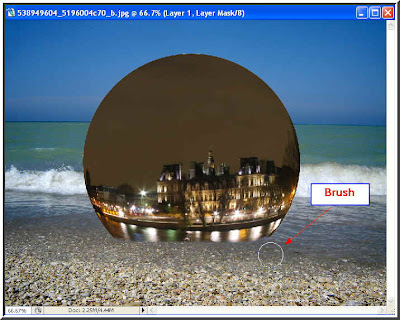
Step 4 : With the Brust Tool gently wipe away the bottom of the circular image.

Here is your fish eye with background and with an added effect. Try it out.
About Me
- satwik sharma
0 comments: