Blog Archive
-
▼
2008
(22)
-
▼
February
(17)
- create solar eclipse in photoshop
- eclipse in photoshop
- fire effect in PS
- correcting a photo in photoshop
- fisheye effect
- add a tatoo
- adding sunburst
- Vignette with an extra tweak
- lightning in photoshop
- popup from frame wid photoshop
- swapping faces
- Making a collage from a Photo in Photoshop
- skin colour toning....
- blending 2 images in photoshop
- advanced blending
- moonset in water..
- convert a pic inta a sketch...
-
▼
February
(17)
counter
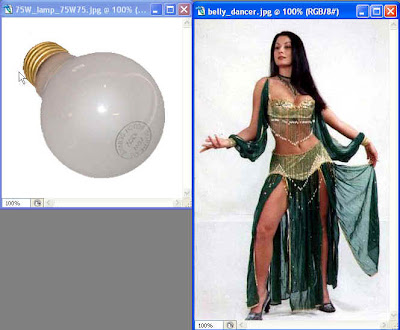 Step 1 : I have opened these two images in Photoshop. I propose to cut out both from their frames using the Pen Tool. The Pen Tool is superior in cutting out an image because it is absolutely precise and cuts from half a pixel. This leaves the edges nice and sharp as in the original image. But you must have patience in using to Pen Tool.
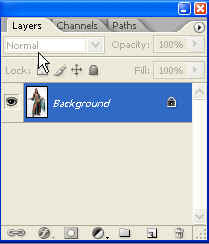 Step 2 : I have clicked on the image of the belly dancer. This shows up as the 'Background' in the Layers/Channels/Paths pallette. (see above). Notice the lock symbol. The background cannot be edited. It is 'locked'. To edit it we have to 'unlock' it. Double click the 'Background'.
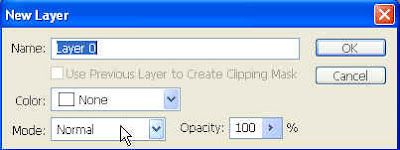 Step 3 : As soon as you double click the 'Background' this dialogue box pops up. Click ok.
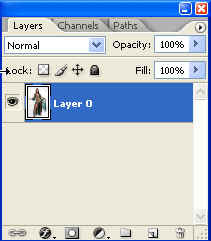 Step 4 : Notice that 'Background' has turned into Layer 0.
 Step 5 : Click on the Zoom Tool shown by the arrow.
 Step 6 : in the panel at the top left click on the magnifying glass icon with the + (plus) sign. This allows you to zoom in.
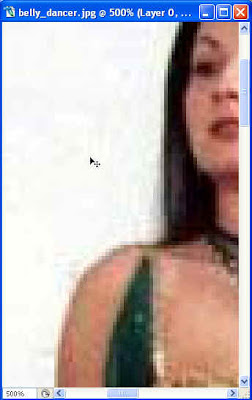 Step 7 : Place the cursor on the image and zoom in as I have done. Now it's time to use the Pen Tool.
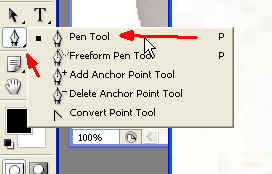 Step 8 : See where the Pen Tool is located as shown above. From the flyout click to select it.
 Step 9 : In the top panel click on the 'Path' icon marked by the white arrow.
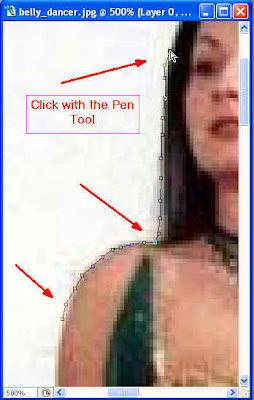 Step 10 : Here comes the part requiring patience. You have to click little by little with the Pen Tool till you come back to the first point you began clicking.
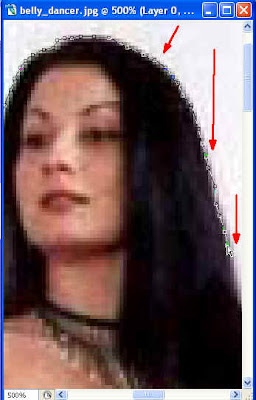 Step 11 : I have continued clicking with the Pen Tool and I have come to right of the image.
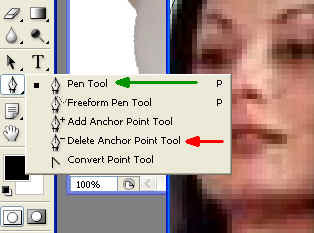 Step 12 : Should you make a mistake click the 'Delete Anchor Point Tool' (red arrow) . Delete the anchor points necessary and again click back on the 'Pen Tool' (Green arrow).
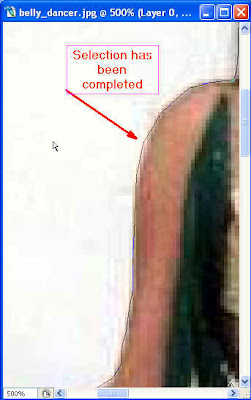 Step 13 : I have completed the path i.e. I have come back to the first point from where I began clicking. The path changes into a thin line.
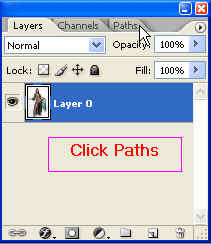 Step 14 : Now go to the layer/Channels/Paths palette and click the 'Paths' (see white arrow).
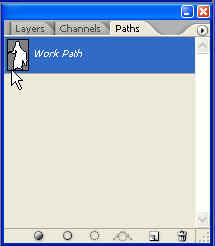
Step 15 : As soon as you click 'Paths' you can see the 'Workpath' (see the white arrow).
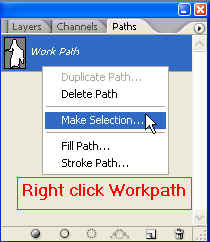
Step 16 : Right click the Workpath and a little dialogue box as above will open. Click the 'Make Selection'.
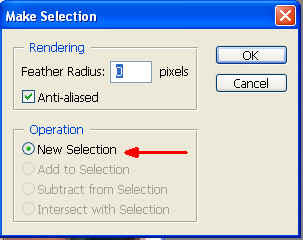
Step 17 : This dialogue box pops up. Always set the Feather radius to zero. 'Operation' (red arrow) should be 'New Selection'. The 'Anti-aliased' should be ticked.
Step 18 : You can see that the selection is visible now as 'marching ants'.
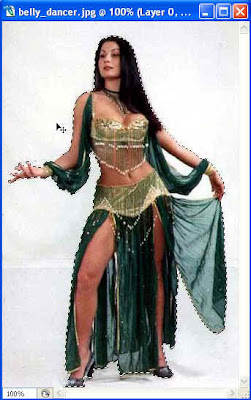 Step 19 : Zoom out using the Zoom Tool shown in step 5 & 6. Click the magnifying glass icon at the top with the minus sign. Now you can see the full image as also the marching ants selection.
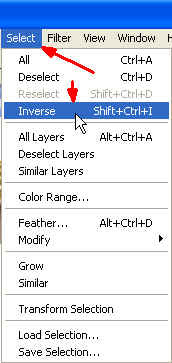
Step 20 : Now go to Select>Inverse at the top as shown above.
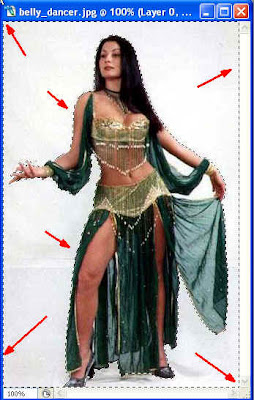
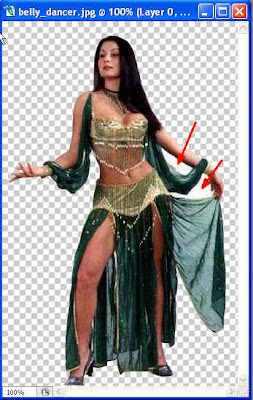
Step 22 : As soon as you hit the delete key. The background disappears save for the white portions I have shown with the red arrows. The Pen Tool will have to be used to remove those portions as well in exacly the same way. This is why I said that using the Pen Tool needs patience. But the rewards are enormous too.
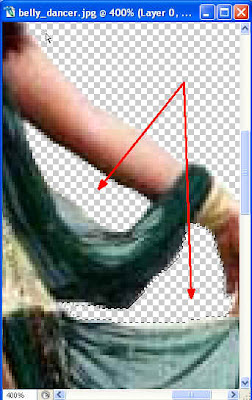
Step 23 : I have now removed the white portions too by making a selection with the PenTool, making a workpath and then deleting as shown step step above.
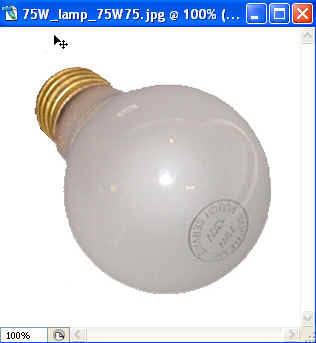
Step 24 : Now following the same steps that I did for the belly dancer I will cut out the bulb.
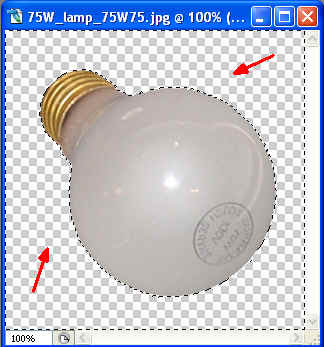
Step 25 : I have deleted the background from the bulb.
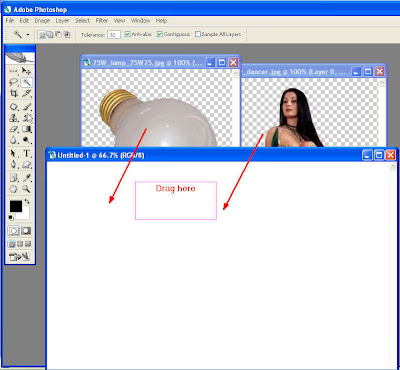
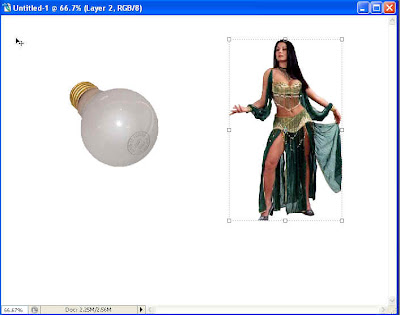
Step 27 : The bulb and the bellydancer are now on the white layer. I propose to place the belly dancer inside the bulb, but the bulb is too small. Before we do anything more let us have a look at the Layers/ Channels/Path pallette.
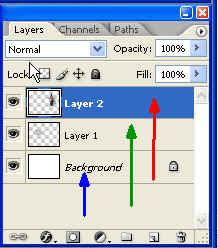
Step 28 : In the Layers/Channels/Paths pallete the white layer is the 'Background' (blue arrow), the bulb is 'Layer1' (green arrow) and the belly dancer 'Layer 2' (red arrow). Layer2 or the one containing the bellydancer is active. You can make this out as it is highlighted.
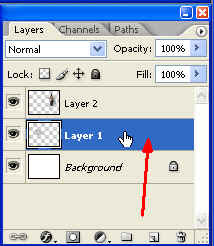
Step 29 : I have selected Layer 1 or the one with the bulb. Note that this layer has become active. You make a layer active by clicking on it.
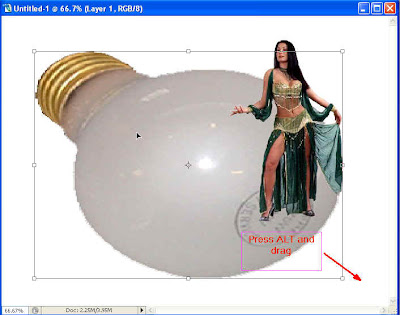
Step 30 : Press ALT on your keyboard and drag the bulb layer to the righthand corner at bottom.

Step 31 : Click on the Move Tool or any other tool on the left panel and when this dialogue box opens click 'Apply'.
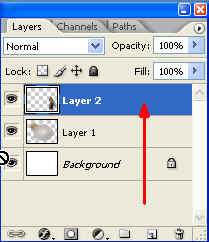
Step 32 : Now I have clicked on the layer containing the belly dancer (see red arrow). It is highlighted since it is selected.
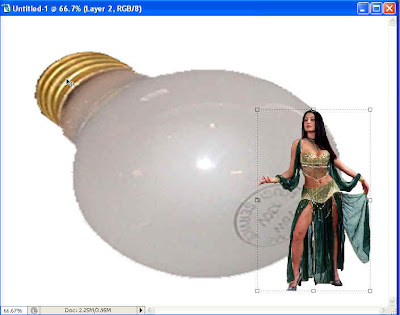
Step 33 : Meanwhile this is how the layers look. Now to put the belly dancer in the bulb use the Move Tool t drag the belly dancer inside the bulb.
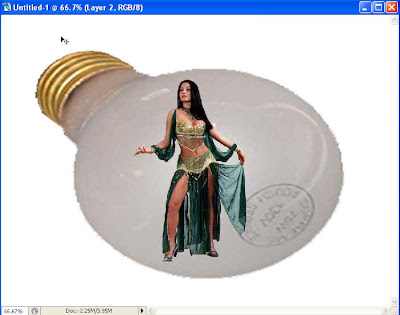
Step 34 : Now the bellydancer is on the bulb, but not quite 'inside'.
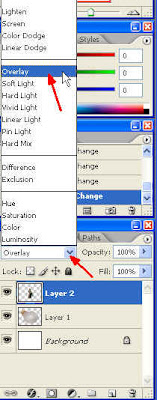
Step 35 : Go to he Layers/Channels/Paths pallette and change the blend mode from the pop up to 'Overlay'.
 Step 36 : Now the belly dancer seems right inside the bulb. That's it. But you can add an effect.

Step 37 : Chhose the bulb layer then go to Layers>Layer Style>Drop Shadow
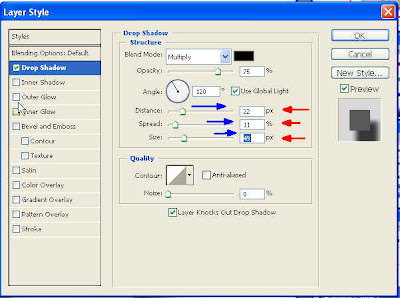
Step 38 : In the Layer Style dialogue box that pops up I have changed the 'Distance', 'Spread' and 'Size' by dragging the sliders to the right. How much effect is required will depend on the image you choose. You should feel free to experiment.
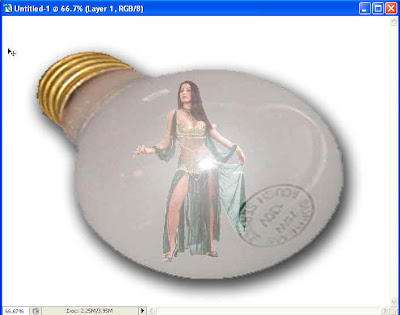
This is the finished image. I hope it has been easy to follow.
About Me
- satwik sharma
0 comments: