counter
 Step 1 : Open a New 640 x 400 pixel document by going to File>New.
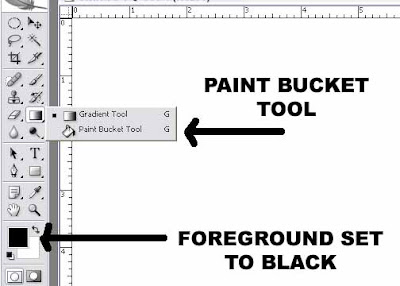
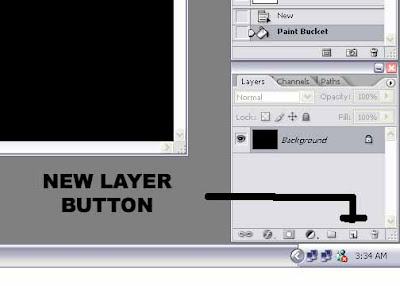
Step 4 : Click the New Layer Button shown. It will create a new layer.
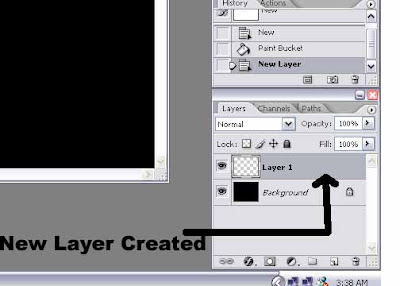
Step 5 : The New Layer has been created.
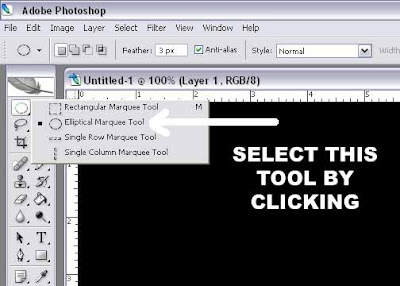
Step 6 : Select the Elliptical Marque Tool by clicking it.

Step 7 : Press Shift on the keyboard and drag. A perfect circle will be created.

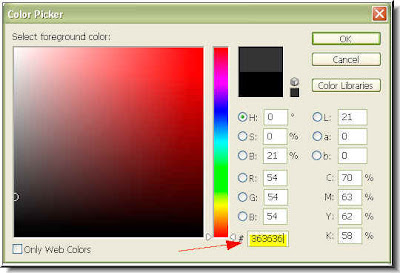
Step 8 : Now set the Foreground Colour to White. Clicking on the small arrow switches between the Foreground and Background colour. Select the Paint Bucket Tool again.
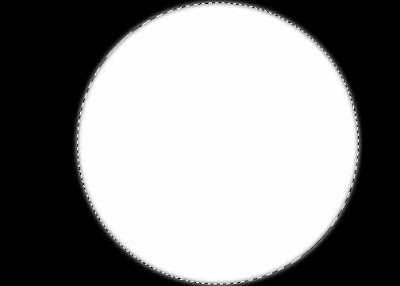
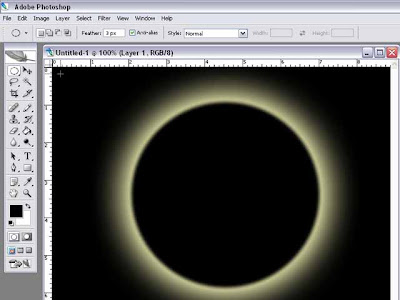
Step 9 : This is how it should look after filing the circle with White.
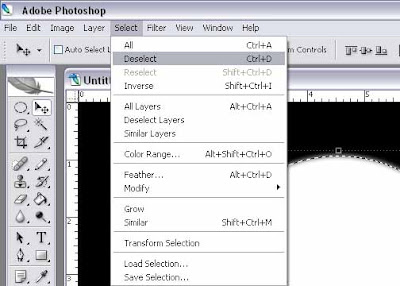
Step 10 : Go to Select>Deselect to deselect the Elliptical Marque Tool

Step 11 : The Opacity and Fill Sliders are in the Layers/Chanels/Paths pallette at bottom right of Photoshop. Drag the Fill slider to the extreme left. This will cause the white circle to disappear.

Step 12 : Go to Layer>Layer Style>Outer Glow as shown.
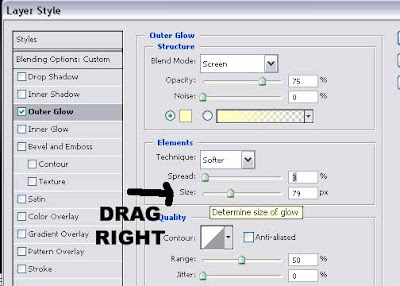
Step 13 : Drag the Size Slider to the right after this dialogue box opens. There is no hard and fast rule how much you should drag. It should satisfy you.
Step 14 : This is how it should looks after clicking OK. Now REPEAT this step.

Step 15 : This is how it look after repeating the above step. The glow is more diffused now.
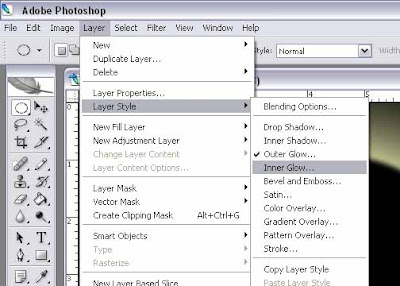
Step 16 : Now go to Layer>Layer Style>Inner Glow

Step 17 : In the dialogue box which opens drag the Size slider to the right till you are satisfied with the result. Click OK.

Step 18 : Now go to Layers/Channels/Paths pallete. Press SHIFT on the keyboard to select both Background and Layer 1.

Step 19 : Now right click as shown. It will bring up the dialogue box as shown. Click MERGE LAYERS.
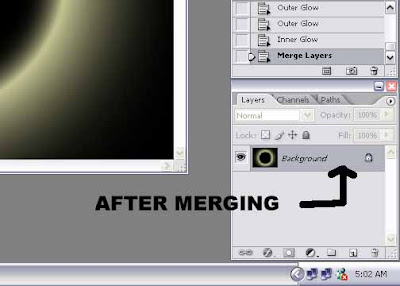
Step 20 : The Layers have been merged.
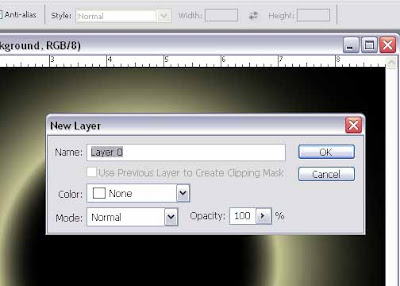
Step 21 : Now click the New Layer Button. It will create a new layer as shown.

Step 22 : Double click the background. The background layer cannot be edited. Therefore double click it to make a copy of it.
Step 23 : This dialogue box opens click OK.

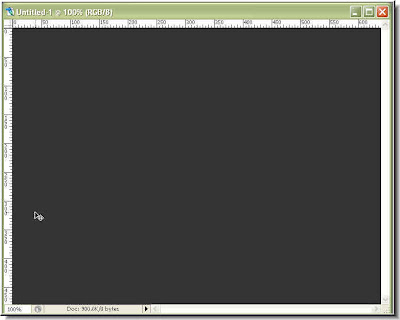
Step 24 : Now drag Layer 1 below Layer 0 as shown. Now Fill Layer 1 with Black using the Paint Bucket Tool.

Step 25 : Now click Layer 0 and click the Quick Mask button. It will create a Quick Mask on Layer 0.

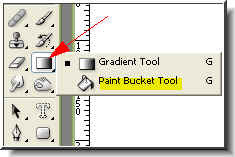
Step 26 : Now click the Gradient Tool shown above.
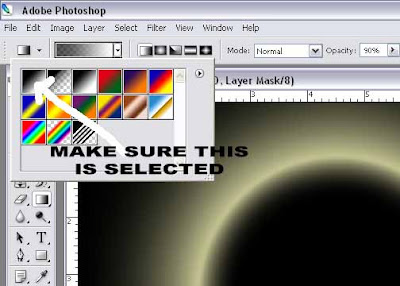
Step 27 : Make sure the Black to White gradient is selected. You can select it by clicking it if it is not selected.
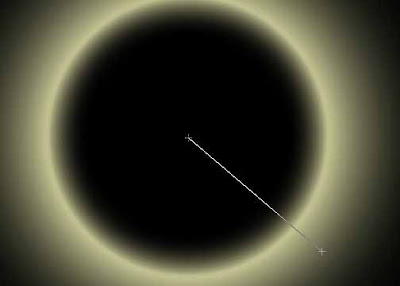
Step 28 : Now drag the Gradient Tool from the bottom right to the middle as shown.
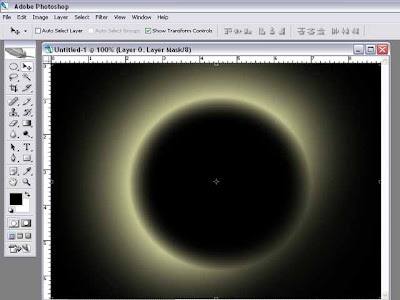
Step 29 : This is how it looks after applying the gradient. A few more steps remain. Just be patient.

Step 30 : Now just as in Step 18 and 19 select both the layers by clicking on the layers while pressing SHIFT key. Then Merge both layers.

Step 31 : Now go to Filter>Render>lens Flare.

Step 32 : When the above dialogue box opens choose 50-300mm Zoom. The first one and click ok. That is all.
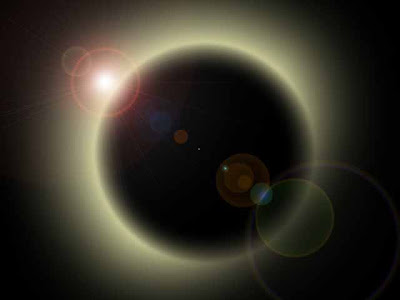
This is the completed image. Have fun.
 Used the tutorial below this post to create this. Instead of choosing the Elliptical Marque Tool to create a circular selection for the 'eclipse' effect illustrated below, I have used the Shape Tool.
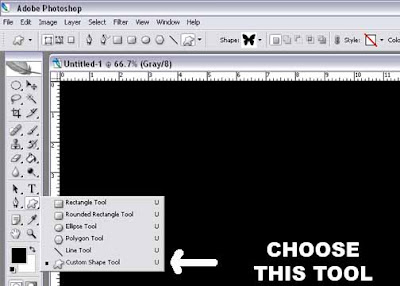
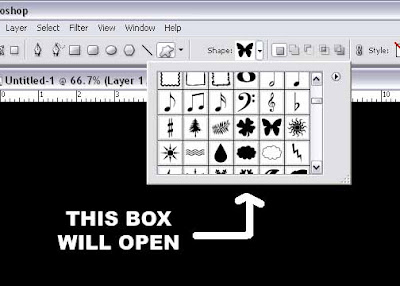
Step 2 : This dialogue box will open. It may vary slightly in Photoshop7. I am using Photoshop CS2. But that does not matter. I have chosen the butterfly. You can choose any shape.
Step 3 : The butterfly outline has been drawn. I set the Foreground colour to White before drawing the outline. Make sure you do so too. Now add Outer Glow and Inner Glow before going to the next step. See the earlier tutorial

Step 4 : Notice that a Vector Mask has been formed. You need not worry what it is. Just know that a Vector Mask has been formed.
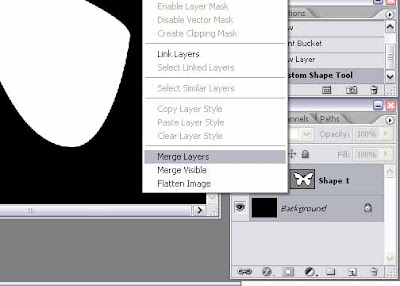
Step 5 : Press SHIFT on your keyboard to select both the 'Background' and 'Shape 1'. When the dialogue box opens click Merge Layers. This will merge the two layers.
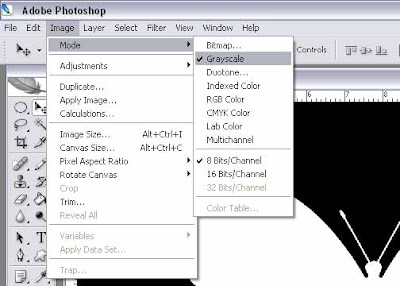
Step 6 : Go to Image. You will see a tick next to Grayscale. This has to be changed to RGB.
This is what is different from the 'Eclipse' Tutorial.
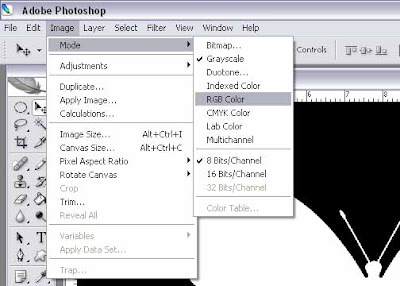
Step 7 : While the dialogue box is open, click 'RGB Color' to select it.
 Step 8 : Now just follow the steps in the other tutorial. Click the New Layer Button. A new layer will form.
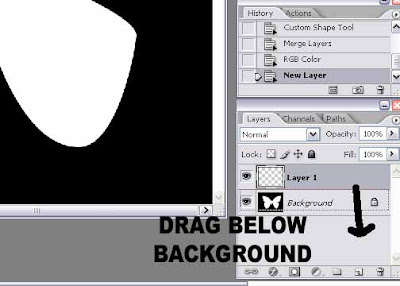
Step 9 : Double click the Background Layer to make it editable. Remember to do it. Then drag Layer 1 below it.

Step 10 : Now Layer 1 is below Layer 0
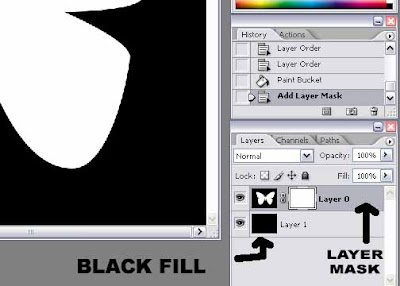
Step 11 : Now fill the Layer1 (the new layers) with Black with the Paint Bucket Tool. Click on Layer 0 and click the Layer Mask Button. The Mask has been formed. If you have read the earlier tutorial it will present no difficulties.
Step 12 : Now add the gradient. See the earlier Tutorial on how to do it.

Step 13 : Now go to Filter>Render>Lens Flare and add the Lens Flare.

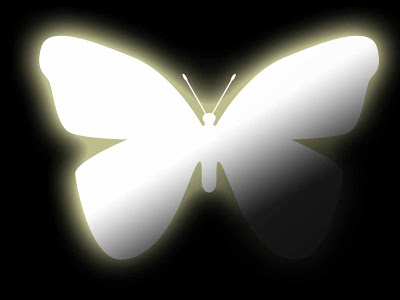
Step 14 : Here's the finished image. You can use this as baackground and blend other images into it.

Step 4 : Click the Paint Bucket Tool. Now fill the white layer with the color.
Step 5 : The white layer has been filled.
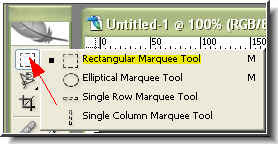
Step 6 : Click the Rectangular Marquee Tool to select it.

Step 7 : The selection has been made.

Step 8 : Click the Foreground color again.

Step 9 : Put FFC001 where the red arrow points to. Click ok.

Step 10 : Now click the Background color (red arrow).
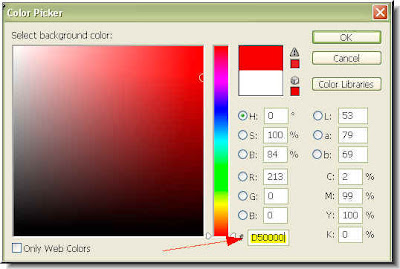
Step 11 : When the Color Picker dialogue box opens place D50000 in the box shown by the red arrow. Click ok.
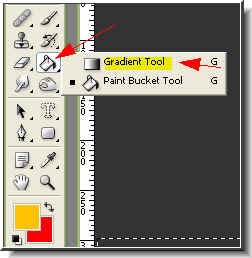
Step 12 : Click the Gradient Tool to select it.
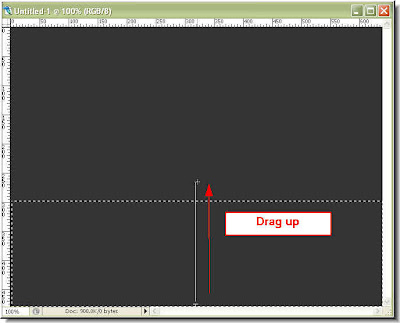
Step 13 : Now drag up from the bottom of the selection upwards as shown.
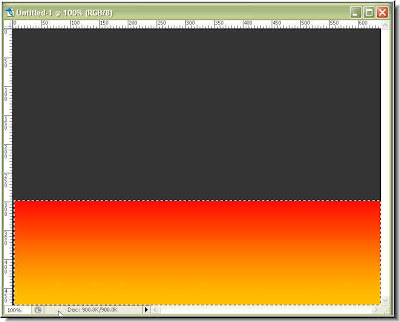
Step 14 : This is how the gradient looks. Press CTRL+D on your keyboard to deselect.

Step 15 : Click on the Brush Tool at the top and set the Master Diameter at 30 pixel and Hardness to to 85 %.
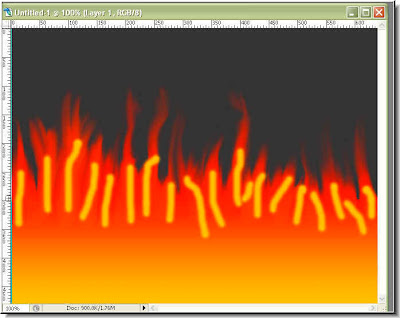
Step 16 : Press 'R' on the keyboard which will bring up the Smudge Tool. Now drag up with the Smudge Tool as shown.

Step 17 : The flames, but not quite finished.

Step 18 : Go the Layers/Channels/Paths pallette and click the New Layer icon (shown by the small white hand and red arrow). The new Layer -- Layer 1 forms (blue arrow).

Step 18 : Again click on the Brush Tool. Set Opacity at 100 % and set the Diameter and Hardness suitably. It will depend on the size of your canvas.
Step 19 : Draw yellow lines as I have done above. Now press 'R' on your keyboard to bring up the Smudge Tool.
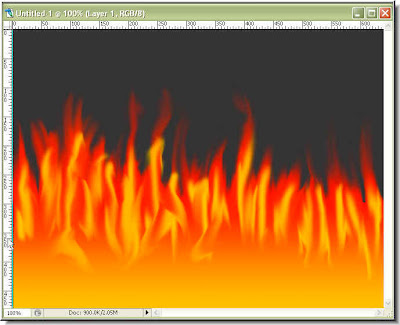
Step 20 : Use the Smudge Tool to smudge the yellow streaks as I have done.
Step 21 : Select the Burn Tool. The blue arrow shows the Smudge Tool. I used a shortcut in the above steps to bring it up. But here we will use the Burn Tool.
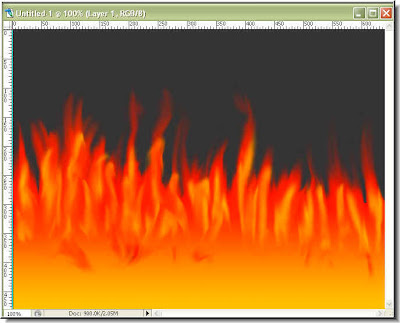 Step 22 : Use the Burn Tool to 'burn' the yellow streaks. The finished flames.