counter
Making a collage from a Photo in Photoshop


Step 2 : Go to File>New. It will open the New Layer dialogue box. Make sure that you set the Background contents to Transparent. Click Ok.

Step 3 : The transparent layer.
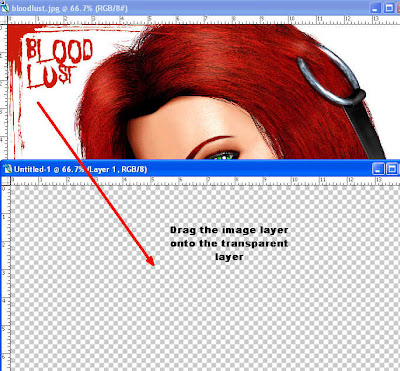
Step 4 : Now click on the image layer and drag it on to the transparent layer.
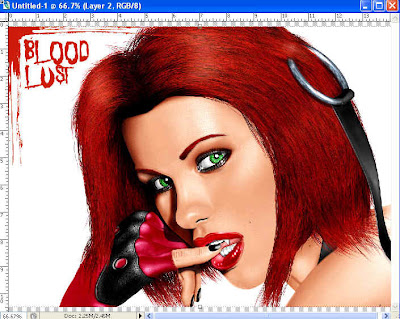 Step 5 : The image layer has been dragged onto the transparent layer.
Step 6 : Go to View>Show. Make sure the 'Extras', 'Rulers', 'Guides' are checked. To tick them just click on them.

Step 7 : Now click on the Move Tool. (Above)

Step 8 : Press ALT on your keyboard and with the Move Tool and drag to resize the image.

Step 9 : Notice the Ruler at the top and left side. Resize the image to the size you want.

Step 10 : Now click the Move Tool at the top margin of the transparent layer and drag down. You will find a fine line. This is a guide. Drag down. Here I have dragged it down to the 3" mark from the top.


Step 12 : I have dragged the Marquee Tool on the first square at the top of the image layer formed by the guides.
Step 13 : Press CTRL+J on your keyboard with Layer 2 selected. In the Layers/Channels/Paths palette a new layer (Layer3) will be formed which copies only the portion marked off in Step12.

Step 14 : Now again click on Layer 2 to make it active i.e. the one you are working on.

Step 15 : Again select the Rectangular Marquee Tool and mark off the second square formed by the Guides. Then Press Alt+J on your keyboard which will copy and paste the selection to a new layer.

Step 16 : The second selection has been copied as Layer 4.

Step 17 : I have then marked off each of the other squares formed by the guidelines and used the Marquee Tool as in Step 14, 15 and 16. Each time I have selected the image layer and then pressed CTRL+J on the keyboard to make a layer of the selected square. Now we have six layers corresponding to the six squares formed by the guidelines.
Step 18 : Now click off the eye icon on the original image layer as shown.

Step 19 : Now click on the Layer Style Button. The one with the 'f' at the left bottom of Layers/Channels/Paths pallete. From the pop up window click on Drop Shadow.
Step 20 : In the Layer Style dialogue box reduce Opacity to 50 per cent, increase the Spread to 40 and Size to 30. (This is not a hard and fast rule. It will depend on the size of your image).

Step 21 : No go the Layers Style palette again as in Step 19. But this time choose Stroke. From the Layers Style dialogue box you will find a red box, which is the default color of the Stroke. Click the red box and the Color picker box will appear as above. Choose a color by using the color picker. I have chosen a shade of green. Click OK.

Step 22 : Change the size to 8.

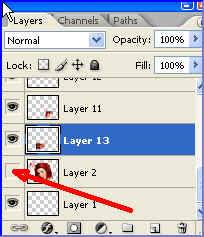
Step 23 : Now right click on the first layer above the image layer. From the pop up menu click Copy Layer Style.

Step 24 : Now Keeping CTRL+Shift press click on each of the layers on the layers till all are selected as shown above.

Step 25 : Now right click on the selected layers and from the popup window click Paste Layer Style. Then press CTRL+H on your keyboard. This will hide the guide lines.

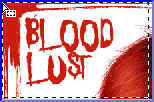
Step 26 : This is how the image looks now.

Step 27 : Go back to the layer above the original image layer and click on it. This will deselect the layers. (See above)

Step 28 : Now go to Edit>Transform>Rotate.
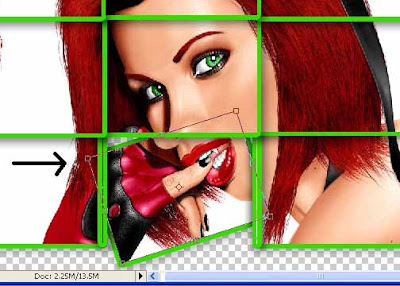 Step 29 : Now hover the Move Tool near the corner handles and a small double bent arrow will appear. Pull it to either the right or left, down or bottom to determine how the rotation will be.
See above. Now comes the tough part. You will have to click on each of the layers one by one and follow Step 28 and Step 29. You can make as many squares as you choose initially, but at this stage you will have to repeat Step 28 and Step 29 for each square.

Step 30 : This how the image now looks like.

Step 30 : Open a New Layer by going to File>New. This time see that the Background Content is White. There is a dropdown window. Click it to see it.

Step 31 : Now drag the White Layer over the other layers. Then go to Image>Arrange>Send Behind. This will send the white layer behind the squares.

Step 32 : Use a Gradient on the White Layer by picking a color from the image. And that's all.It may seem a bit complicated and long. But it is not so. Just go ahead and do it, it's really easy.It just takes a bit of time. Go to File>Save as. Save as Jpeg.
0 comments: